Panzercommander HOH
Battalion Commander
Making The M-1 Garand Web Sling: A Tutorial
A brief history on the real thing:
Approved by the Quartermaster in late 1942, the web sling for the M-1 Garand was designed as a cheaper and easier to use replacement for the M-1907 leather sling. The web sling first saw combat in 1943, and was rather widespread by 1944 and certainly more so by 1945. Though it never fully replaced the M-1907 leather sling; it more than did its part helping troops keep their rifles slung during the war.
When I began to work on late war US subjects, I picked up one of Battlegear Toys' M-1923 web slings to add some variety in the ranks. I did not know that it was the M-1923 web sling at the time I bought it though. When I finally got around to fitting it to a rifle, I found I had no idea how to do so. The Battlegear Toys website merely shows the following:
Pictured Above: The BGT M-1923 web sling attached to a M-1 Garand
The M-1923 web sling was developed during the inner-war years as a less expensive cloth replacement for the M-1907 leather sling while retaining its adjustability for marksmanship. However, it is not very common. Large existing stocks of the M-1907 sling produced during WWI lasted the military until the beginning of WWII and the M-1923 web sling is apparently ridiculously complicated to attach to a rifle.
Though I didn't know it yet, I did not know which web sling I purchased from BGT. I fumbled around the internet for information on the sling and all I found was information on the M-1 web sling. I thought BGT got it wrong (they did not). I was looking at two different types of US web sling.
So, if you buy the BGT M-1923 sling you may leave it as is and it is perfectly fine.
However, if you're interested in modifying it into the more widely used M-1 web sling like I did, continue reading below.
What you'll need:

1. A M-1 Garand (I'm using my favorite version, the DML RTV first pattern M-1 Garand (non-breakable-downable)
2. A DiD Buck Jones Springfield/trench shotgun web sling keeper buckle
3. A small friction buckle (5 mm - measured outside to outside)
4. A DiD Buck Jones Springfield/trench shotgun web sling metal end tab
5. A BGT M-1923 web sling
Hardware Close-Up:
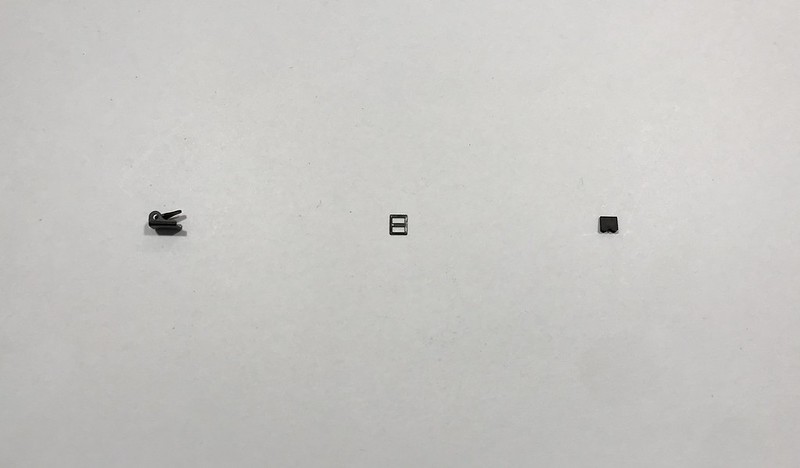
1. A DiD Buck Jones Springfield/trench shotgun web sling keeper buckle
2. A 5 mm (measuring outside to outside) friction buckle
3. A DiD Buck Jones Springfield/trench shotgun web sling metal end tab
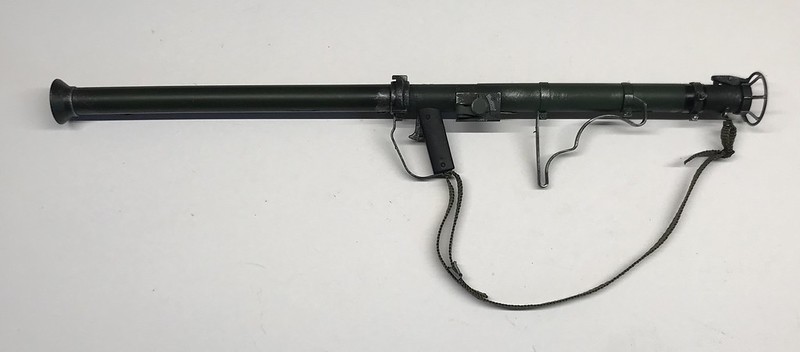
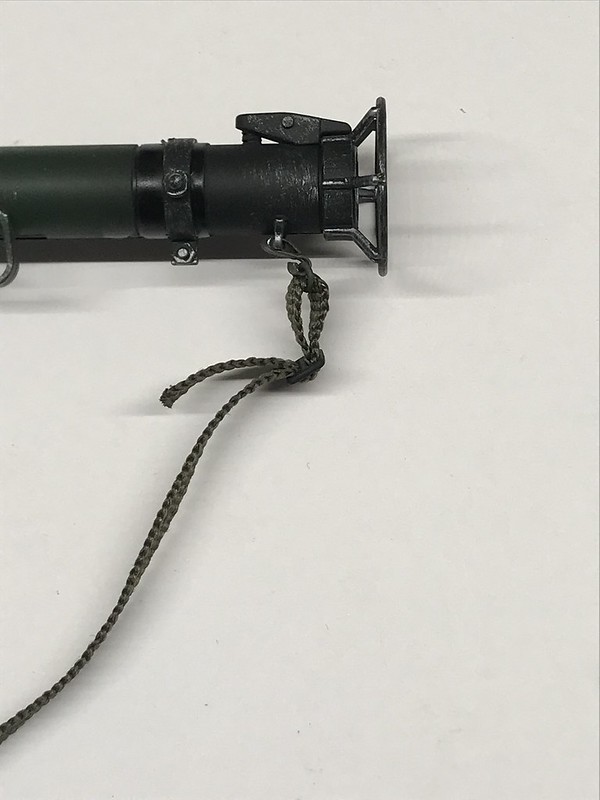
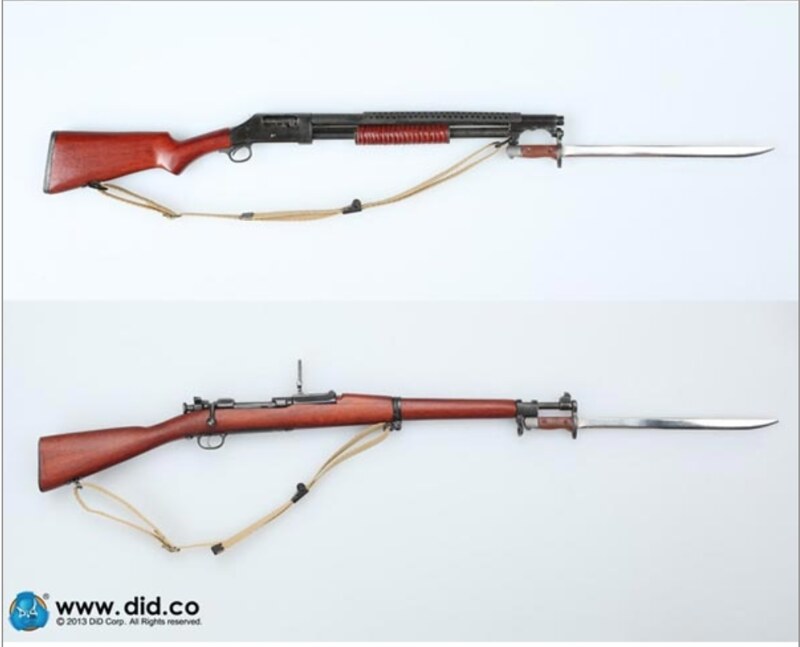
The DiD Buck Jones Springfield/trench shotgun web sling keeper buckle and the metal end tab can be seen on both weapons here:
You can find the 5 mm friction buckle on some of the following German items:

1. The straps to the Soldier Story German Feldgendarme's gas cape pouch
2. DML German binocular straps
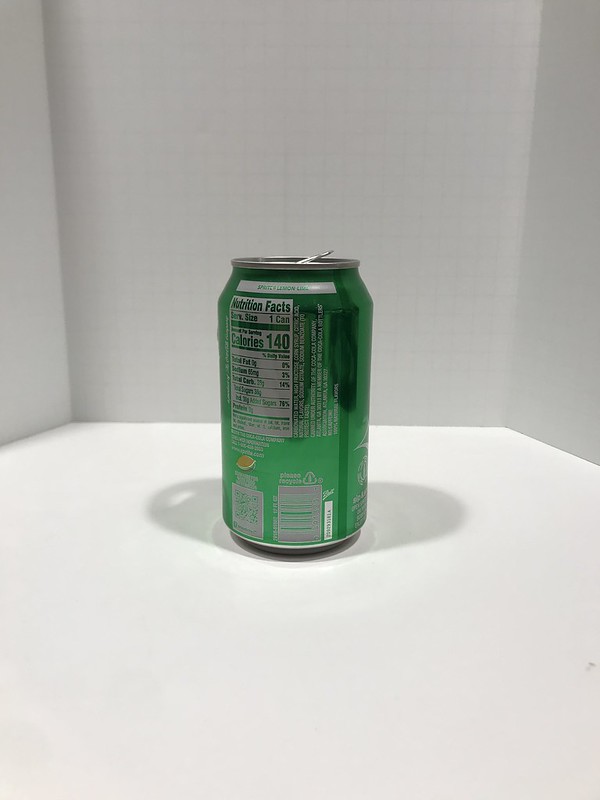
You will also need some metal to make the J-hook to clip on the sling swivel on the stock of the rifle. I used a pop can:
Tools Needed:
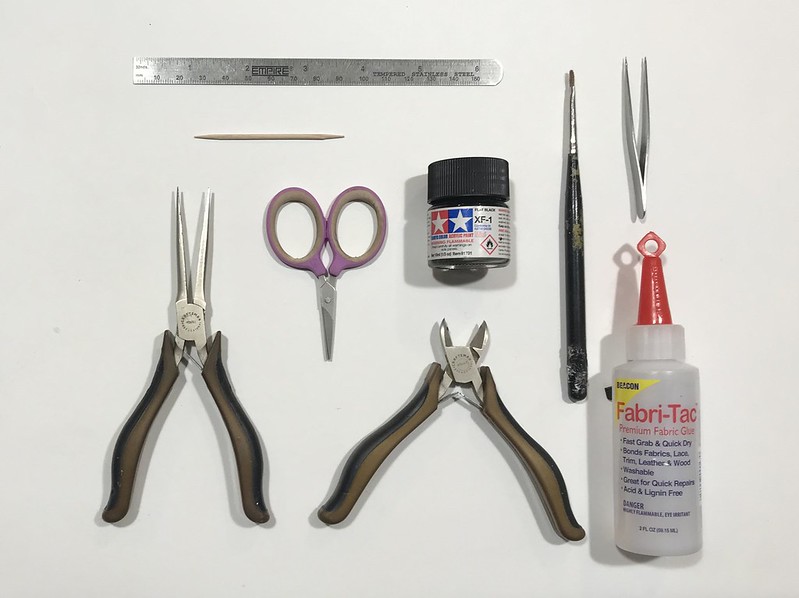
1. Ruler
2. Toothpick
3. Small Needle Nose Pliers
3. Scissors
4. Cutters
5. Flat Black Paint
6. Paint Brush
7. Tweezers
8. Fabri-Tac
The BGT M-1923 web sling looks like this straight out of the package:

You'll want to take it apart using the tweezers so it looks like this:

Save the D ring as you will need it to make the sling. Save everything else as it can be used for another project (more on that later).
Take the longest of the two portions of the BGT M-1923 web sling and run the unpainted end of it through the 5 mm friction buckle. Fabri-Tac the end back to itself just after the friction buckle like this:

Slide the D ring on the web sling with the D curvature facing out. The small end of the web sling that you Fabri-Tac'ed down after the 5 mm friction buckle should face down (opposite side of the D curvature of the D ring):

Set that aside for a moment.
Making the J-hook:
This part requires a bit of blacksmithing, but it isn't insurmountable by any means.
Cut out a chunk of the pop can (these are remarkably thin these days...). Being that it is so thin, fold it over on itself and form a straight edge.
Cut it down to a manageable size.
Take your ruler and measure out and mark 15 mm on the aluminum:
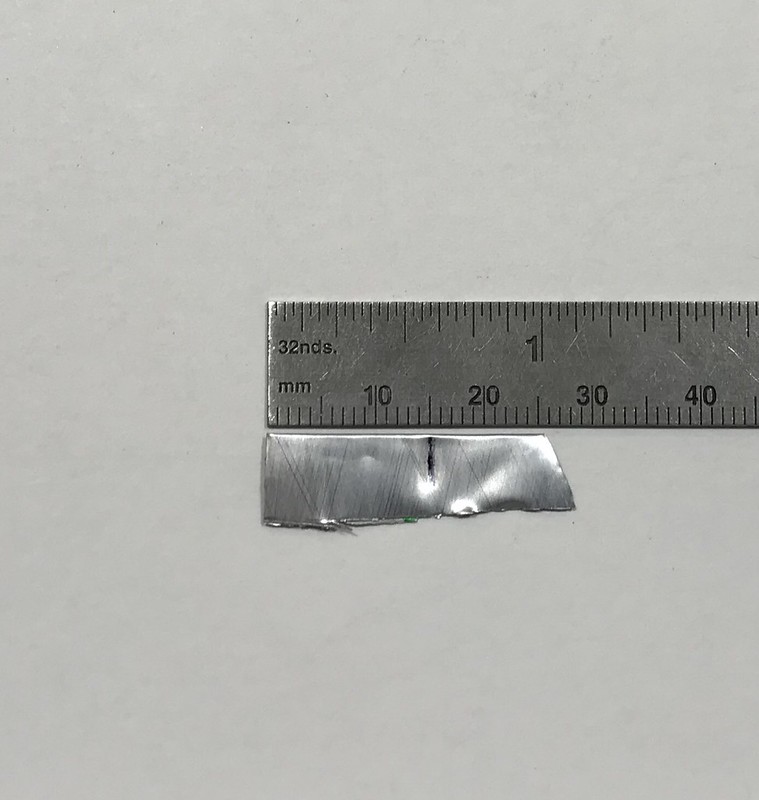
Then measure a 5 mm width on the aluminum:
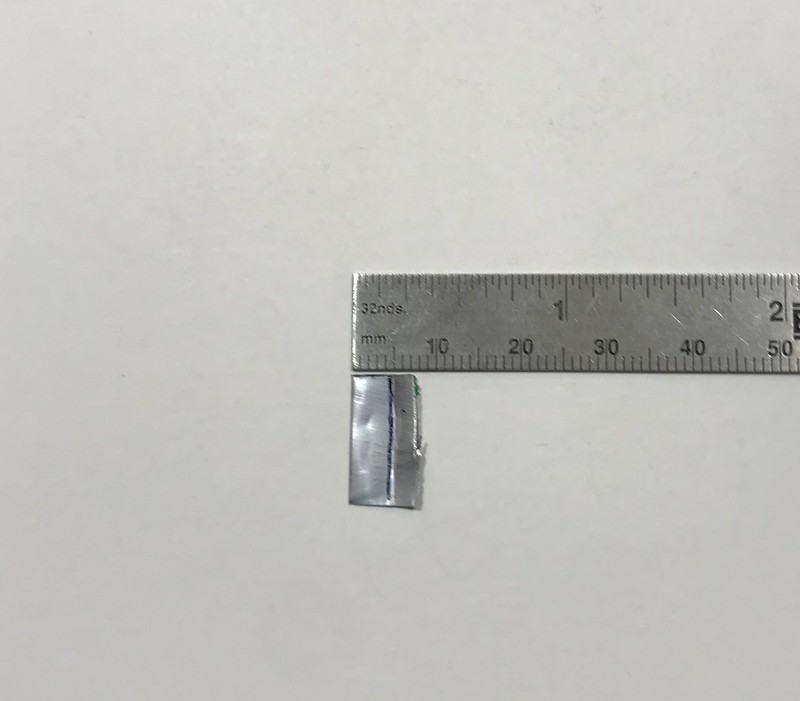
Once you've fashioned the 5 mm wide by 15 mm long rectangular piece, you're going to bend it into an "S" shape:

Like this:

Now take the cutters and round each end of the "S" shape:
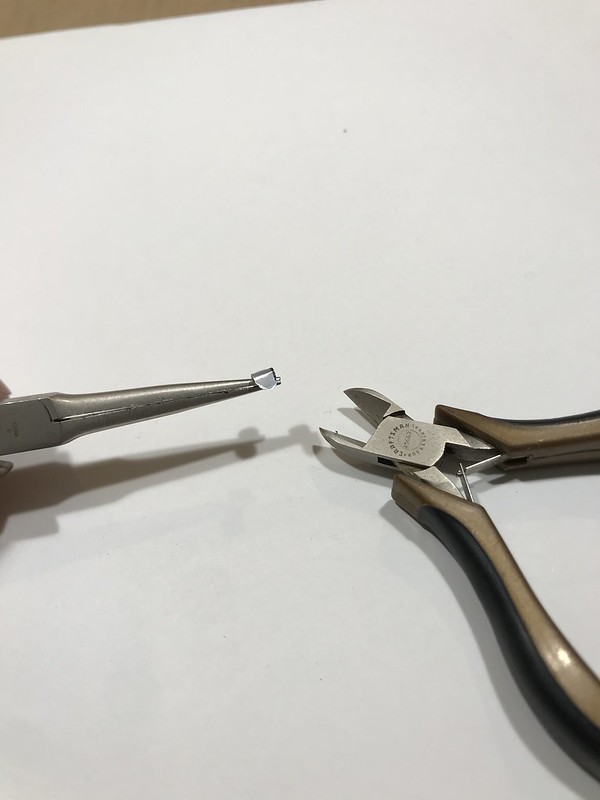
Once you've rounded the ends, paint it flat black:

Et voilà ! This is your J-hook.
Now set the J-hook aside for a moment.
Get your M-1 Garand, the web sling you've already started, and the DiD Buck Jones keeper buckle back out.
Making sure you do not twist the sling, run the black painted end of the web sling through the 5 mm friction buckle. It is a tight fit, you may need to trim the black painted web sling end down to a point to get it through the 5 mm friction buckle. It also might fray when you are running it through the friction buckle.
Now, open up the keeper on the DiD Buck Jones keeper buckle and run it through the black painted end of the web sling, hinge side first:
Making sure you do not twist the sling, take the black painted web sling end loop it through the middle sling swivel (the second one from either end of the gun) and then run it back through the DiD Buck Jones keeper buckle (on top of itself). Clamp the keeper shut. Trim any fraying ends from the painted end of the web sling. Glue the DiD Buck Jones webbing end tab on the end of the freshly trimmed web sling end.

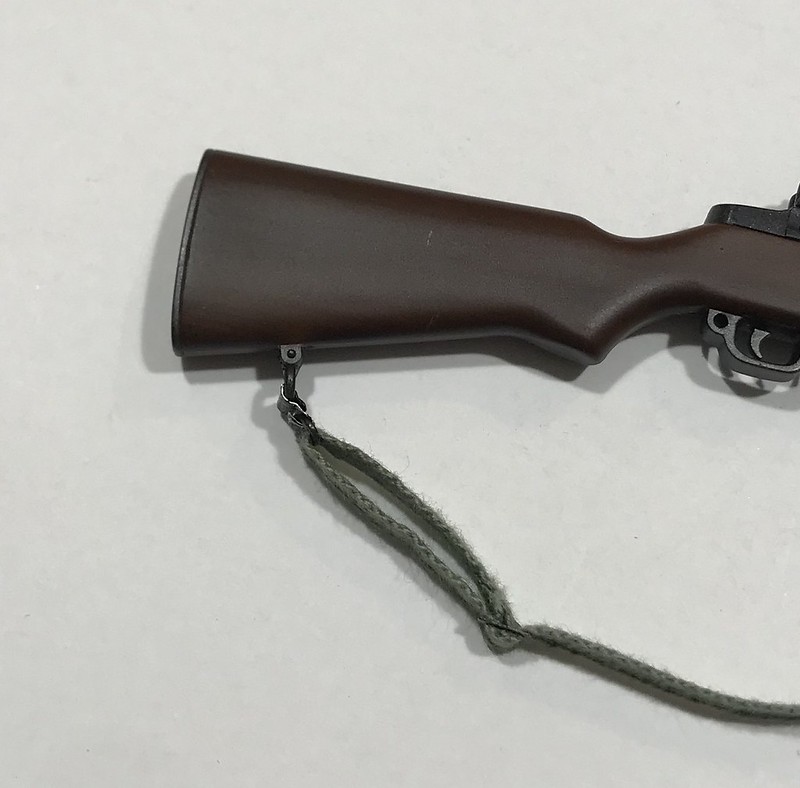
Grab the "S" shaped J-hook that you made. run one of the clipped ends through the sling swivel on the butt of the rifle so the clipped end points towards the rest of the rifle:

Run the other clipped end of the J-hook through the D ring on the web sling. That clipped end will point back at the end of the stock. Using the needle nose pliers, clamp the clipped ends of the J-hook down on itself, locking the J-hook around the swivel sling on the stock and around the D ring on the web sling:
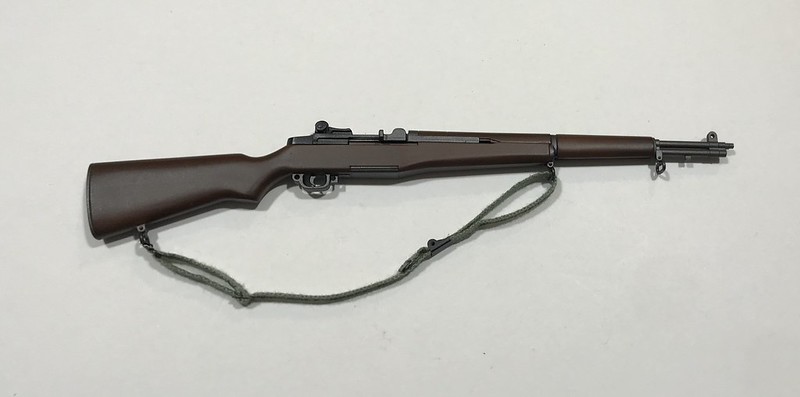
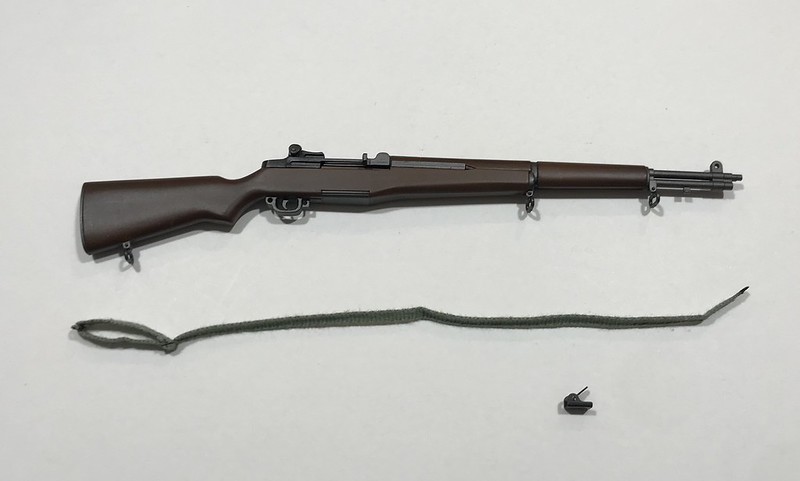
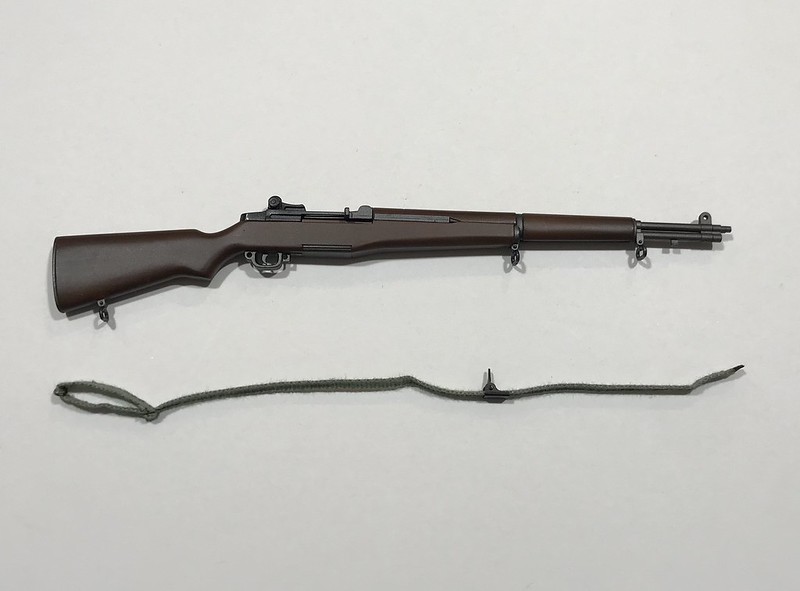
And there you have it! You've made a much more accurate version of the M-1 Garand web sling!
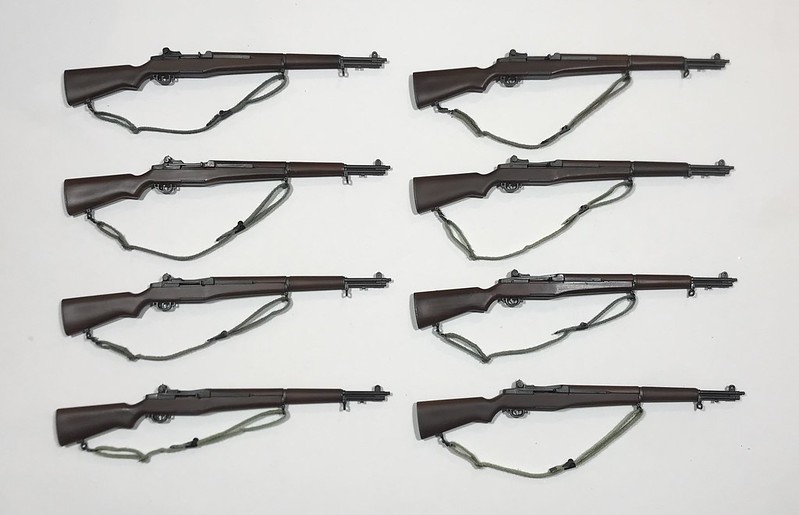
Finished Product:
I've made eight:
You can take the short end of the remaining BGT sling and one of the BGT friction buckles to make leg ties for your paratroopers:

(These leg ties are nearly identical to the ones sold on the BGT website...)
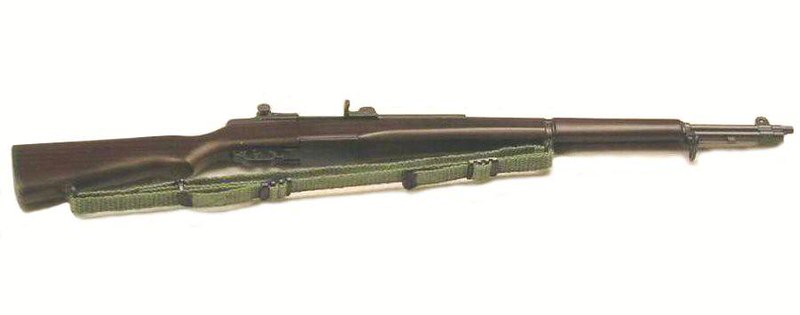
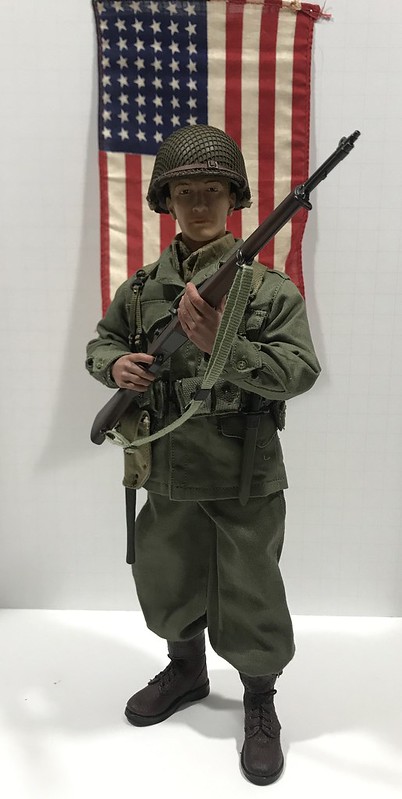
Finally, the sling in action:


Links / References:
The BGT M-1923 Web Sling:
https://battlegeartoys.com/collections/u-s-wwii-equipment/products/u-s-rifle-sings
Installing a 1:1 M-1 Garand Web Sling:
https://www.youtube.com/watch?v=jsyno5o1rY8
At The Front: Garand Sling, Web, OD No. 3:
https://www.atthefront.com/M1-Garand-Sling-Web-p/uswm1gw.htm
Questions? Just ask! I'd be happy to help!
A brief history on the real thing:
Approved by the Quartermaster in late 1942, the web sling for the M-1 Garand was designed as a cheaper and easier to use replacement for the M-1907 leather sling. The web sling first saw combat in 1943, and was rather widespread by 1944 and certainly more so by 1945. Though it never fully replaced the M-1907 leather sling; it more than did its part helping troops keep their rifles slung during the war.
When I began to work on late war US subjects, I picked up one of Battlegear Toys' M-1923 web slings to add some variety in the ranks. I did not know that it was the M-1923 web sling at the time I bought it though. When I finally got around to fitting it to a rifle, I found I had no idea how to do so. The Battlegear Toys website merely shows the following:
Pictured Above: The BGT M-1923 web sling attached to a M-1 Garand
The M-1923 web sling was developed during the inner-war years as a less expensive cloth replacement for the M-1907 leather sling while retaining its adjustability for marksmanship. However, it is not very common. Large existing stocks of the M-1907 sling produced during WWI lasted the military until the beginning of WWII and the M-1923 web sling is apparently ridiculously complicated to attach to a rifle.
Though I didn't know it yet, I did not know which web sling I purchased from BGT. I fumbled around the internet for information on the sling and all I found was information on the M-1 web sling. I thought BGT got it wrong (they did not). I was looking at two different types of US web sling.
So, if you buy the BGT M-1923 sling you may leave it as is and it is perfectly fine.
However, if you're interested in modifying it into the more widely used M-1 web sling like I did, continue reading below.
What you'll need:
1. A M-1 Garand (I'm using my favorite version, the DML RTV first pattern M-1 Garand (non-breakable-downable)
2. A DiD Buck Jones Springfield/trench shotgun web sling keeper buckle
3. A small friction buckle (5 mm - measured outside to outside)
4. A DiD Buck Jones Springfield/trench shotgun web sling metal end tab
5. A BGT M-1923 web sling
Hardware Close-Up:
1. A DiD Buck Jones Springfield/trench shotgun web sling keeper buckle
2. A 5 mm (measuring outside to outside) friction buckle
3. A DiD Buck Jones Springfield/trench shotgun web sling metal end tab
The DiD Buck Jones Springfield/trench shotgun web sling keeper buckle and the metal end tab can be seen on both weapons here:
You can find the 5 mm friction buckle on some of the following German items:
1. The straps to the Soldier Story German Feldgendarme's gas cape pouch
2. DML German binocular straps
You will also need some metal to make the J-hook to clip on the sling swivel on the stock of the rifle. I used a pop can:
Tools Needed:
1. Ruler
2. Toothpick
3. Small Needle Nose Pliers
3. Scissors
4. Cutters
5. Flat Black Paint
6. Paint Brush
7. Tweezers
8. Fabri-Tac
The BGT M-1923 web sling looks like this straight out of the package:
You'll want to take it apart using the tweezers so it looks like this:
Save the D ring as you will need it to make the sling. Save everything else as it can be used for another project (more on that later).
Take the longest of the two portions of the BGT M-1923 web sling and run the unpainted end of it through the 5 mm friction buckle. Fabri-Tac the end back to itself just after the friction buckle like this:
Slide the D ring on the web sling with the D curvature facing out. The small end of the web sling that you Fabri-Tac'ed down after the 5 mm friction buckle should face down (opposite side of the D curvature of the D ring):
Set that aside for a moment.
Making the J-hook:
This part requires a bit of blacksmithing, but it isn't insurmountable by any means.
Cut out a chunk of the pop can (these are remarkably thin these days...). Being that it is so thin, fold it over on itself and form a straight edge.
Cut it down to a manageable size.
Take your ruler and measure out and mark 15 mm on the aluminum:
Then measure a 5 mm width on the aluminum:
Once you've fashioned the 5 mm wide by 15 mm long rectangular piece, you're going to bend it into an "S" shape:
Like this:
Now take the cutters and round each end of the "S" shape:
Once you've rounded the ends, paint it flat black:
Et voilà ! This is your J-hook.
Now set the J-hook aside for a moment.
Get your M-1 Garand, the web sling you've already started, and the DiD Buck Jones keeper buckle back out.
Making sure you do not twist the sling, run the black painted end of the web sling through the 5 mm friction buckle. It is a tight fit, you may need to trim the black painted web sling end down to a point to get it through the 5 mm friction buckle. It also might fray when you are running it through the friction buckle.
Now, open up the keeper on the DiD Buck Jones keeper buckle and run it through the black painted end of the web sling, hinge side first:
Making sure you do not twist the sling, take the black painted web sling end loop it through the middle sling swivel (the second one from either end of the gun) and then run it back through the DiD Buck Jones keeper buckle (on top of itself). Clamp the keeper shut. Trim any fraying ends from the painted end of the web sling. Glue the DiD Buck Jones webbing end tab on the end of the freshly trimmed web sling end.
Grab the "S" shaped J-hook that you made. run one of the clipped ends through the sling swivel on the butt of the rifle so the clipped end points towards the rest of the rifle:
Run the other clipped end of the J-hook through the D ring on the web sling. That clipped end will point back at the end of the stock. Using the needle nose pliers, clamp the clipped ends of the J-hook down on itself, locking the J-hook around the swivel sling on the stock and around the D ring on the web sling:
And there you have it! You've made a much more accurate version of the M-1 Garand web sling!
Finished Product:
I've made eight:
You can take the short end of the remaining BGT sling and one of the BGT friction buckles to make leg ties for your paratroopers:
(These leg ties are nearly identical to the ones sold on the BGT website...)
Finally, the sling in action:
Links / References:
The BGT M-1923 Web Sling:
https://battlegeartoys.com/collections/u-s-wwii-equipment/products/u-s-rifle-sings
Installing a 1:1 M-1 Garand Web Sling:
https://www.youtube.com/watch?v=jsyno5o1rY8
At The Front: Garand Sling, Web, OD No. 3:
https://www.atthefront.com/M1-Garand-Sling-Web-p/uswm1gw.htm
Questions? Just ask! I'd be happy to help!
Last edited: