• Pardon the dust while the boys rebuild the site.

    The board will be in a state of disarray as I get things sorted out, for a little while at least.

    The new incarnation is using Xenforo as the system software. It is much like what we are used to, with a few differences. I will see about making a FAQ to help point out the differences for the members.


    One IMPORTANT difference for all of us old timers is that the 'mail' system is replaced with what are called 'conversations'/

    There is no 'Inbox' or 'Out box' or 'Sent' folders anymore.

    Think of Conversations as private 'threads' or topics that don't exist in a forum, that you start with another member. NOTE: Conversations can include more than one member if you or someone else in the conversaion, likes.
    Takes a little getting used to but I am sure you all can get a hang of it.


    Only a slightly modified default default Xenforo style is available for now. Once the new SAG style is ready it will be available.

    All existing users should be able to login with their usernames and passwords once the site goes up.


    If anyone has difficulties logging in please contact me at sixthvanguard@gmail.com.


    Thank you for your support and patience. I know it has been a loooong road.

Sd.Kfz.138/1 Grille Ausf K/M

fusilier1944

Company Commander
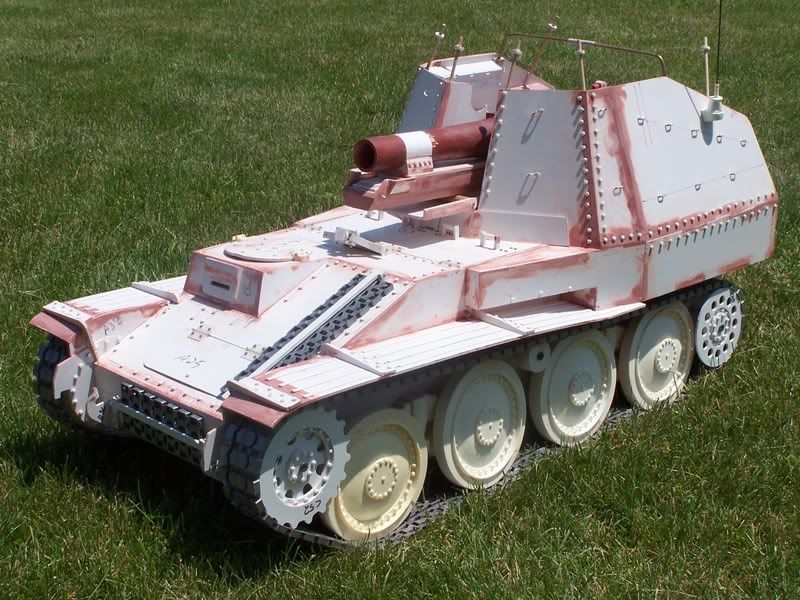
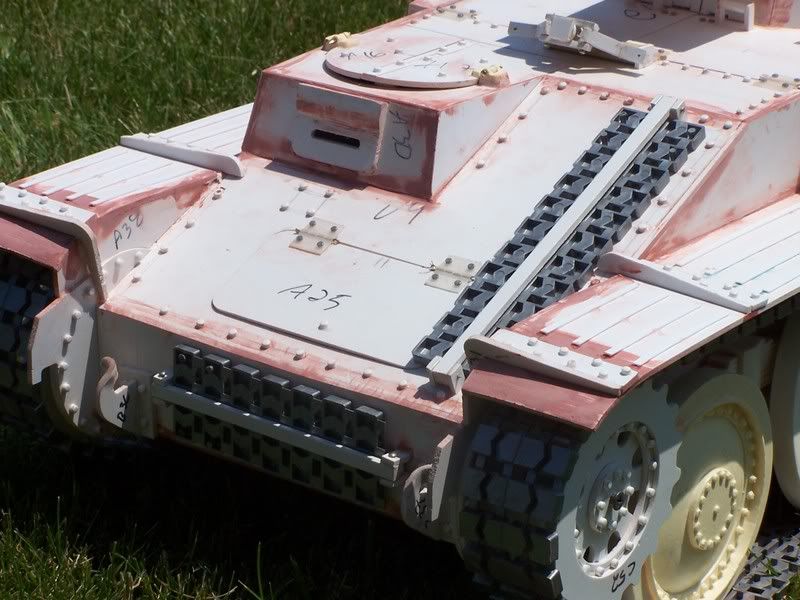
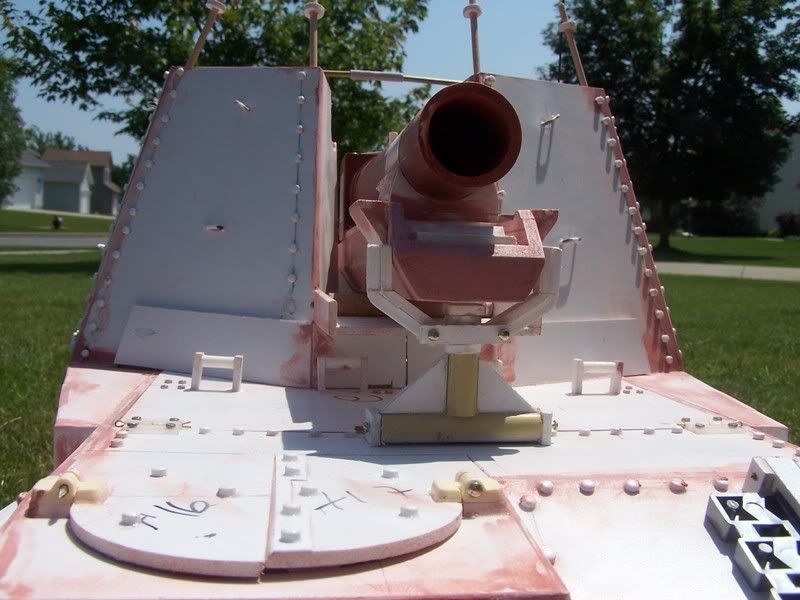
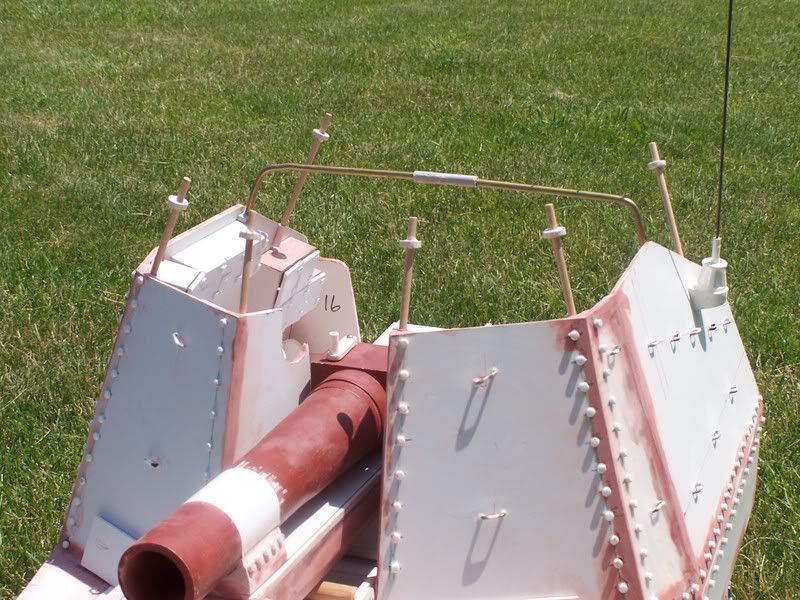
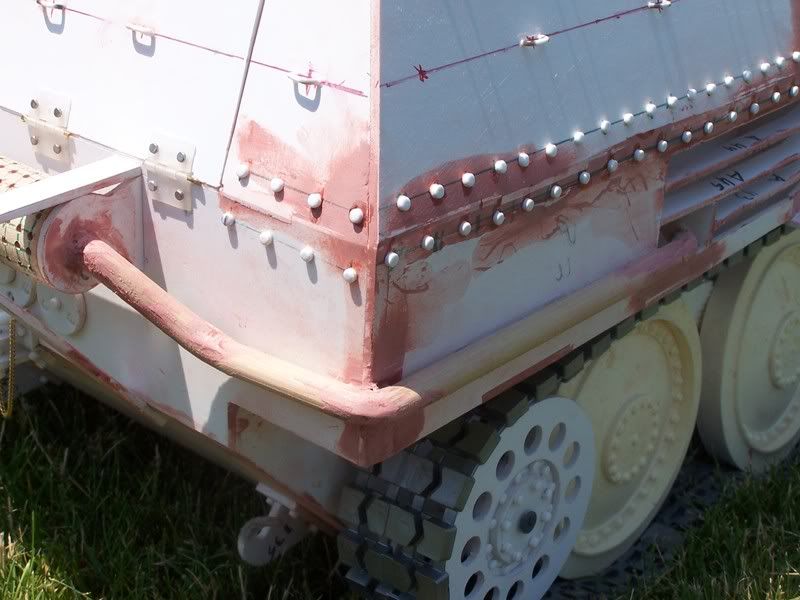
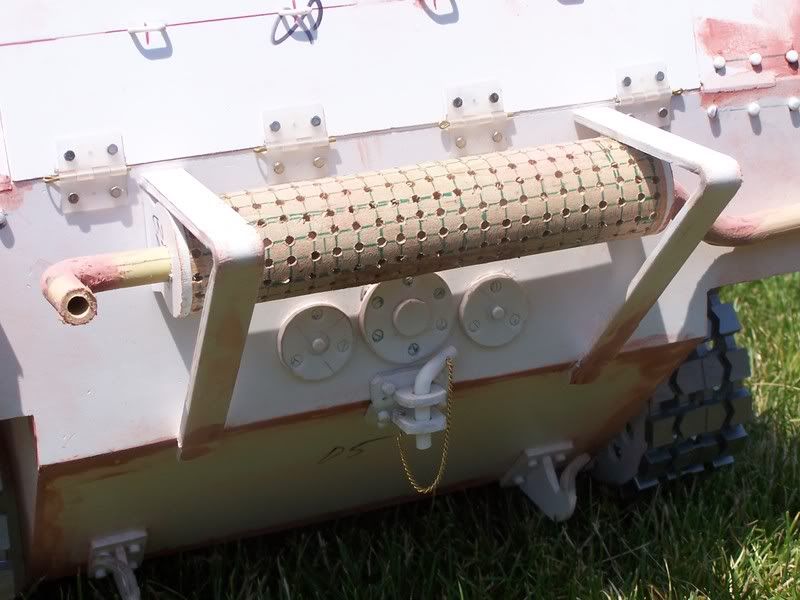
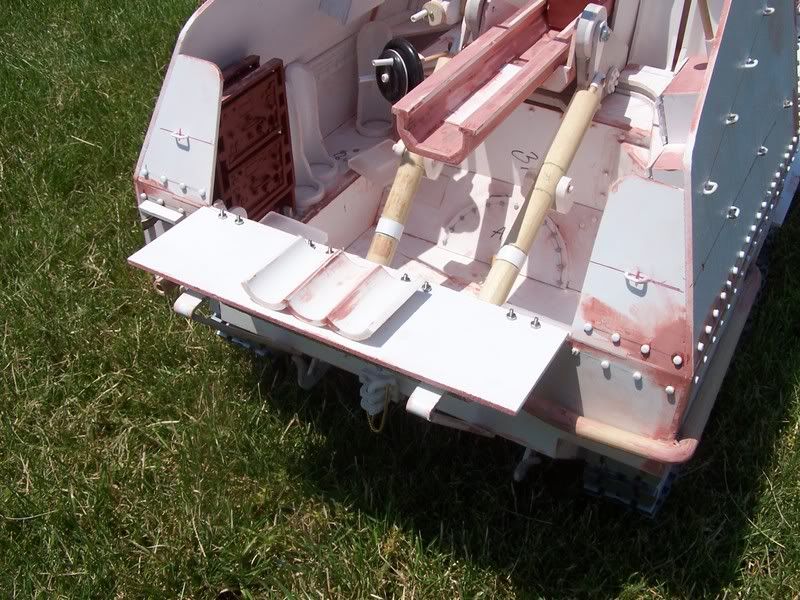
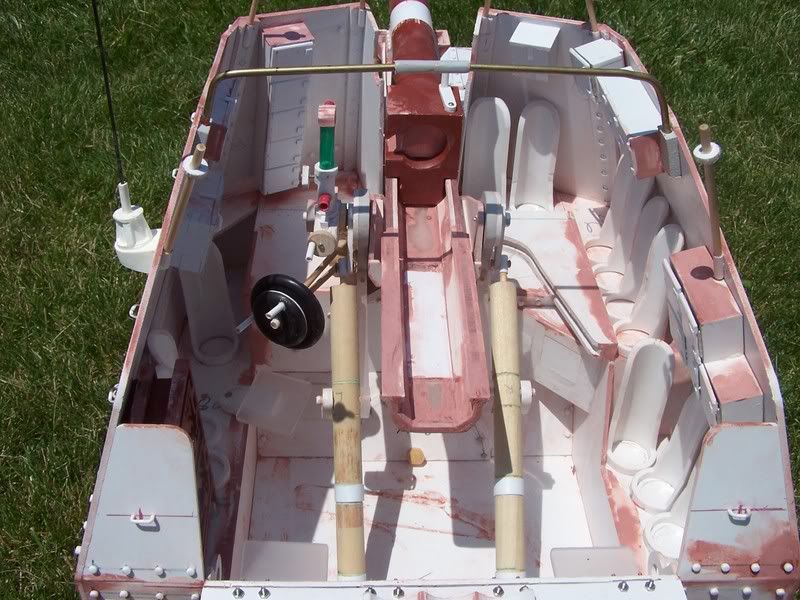
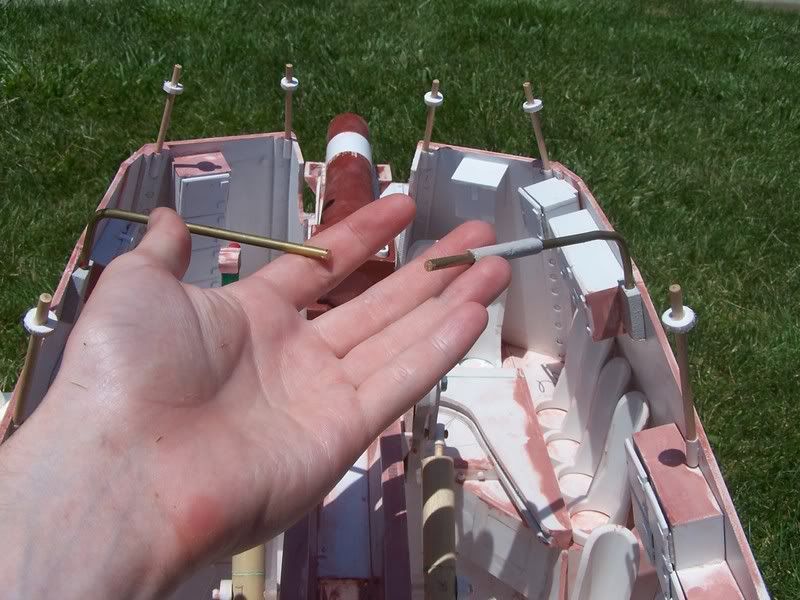
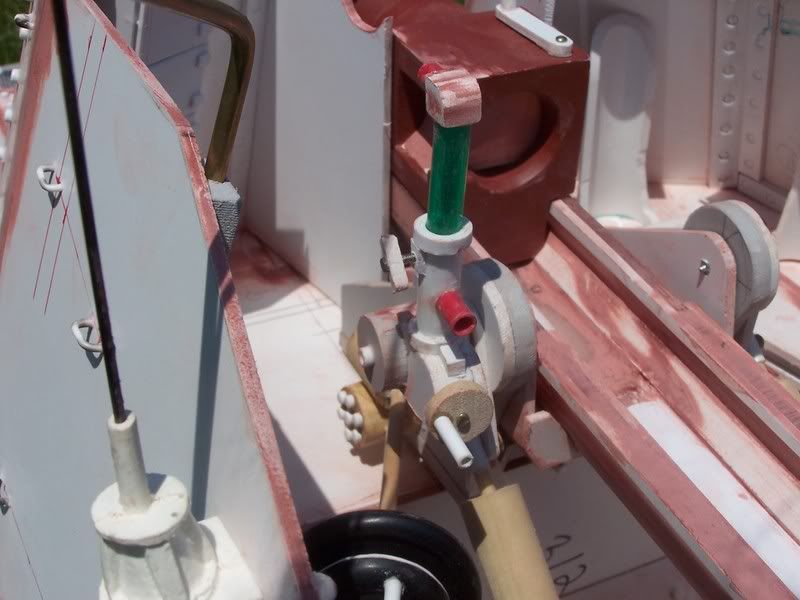
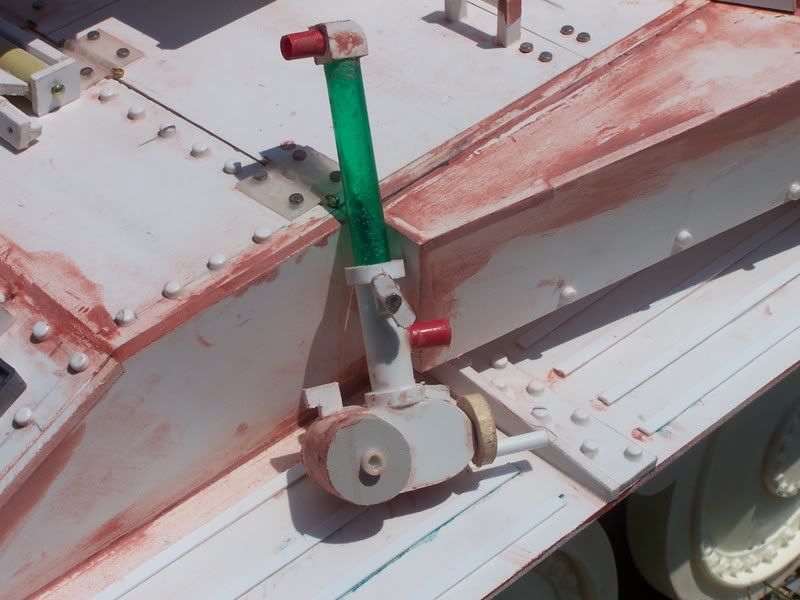
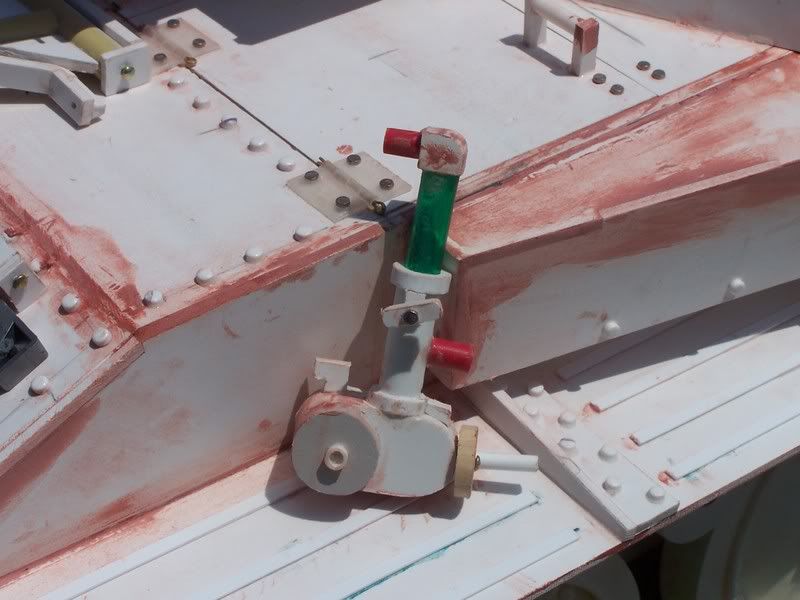
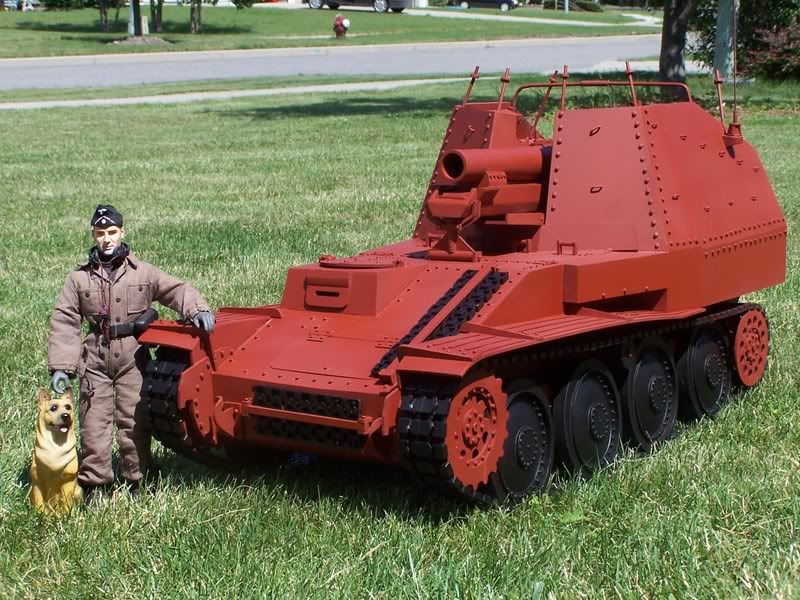
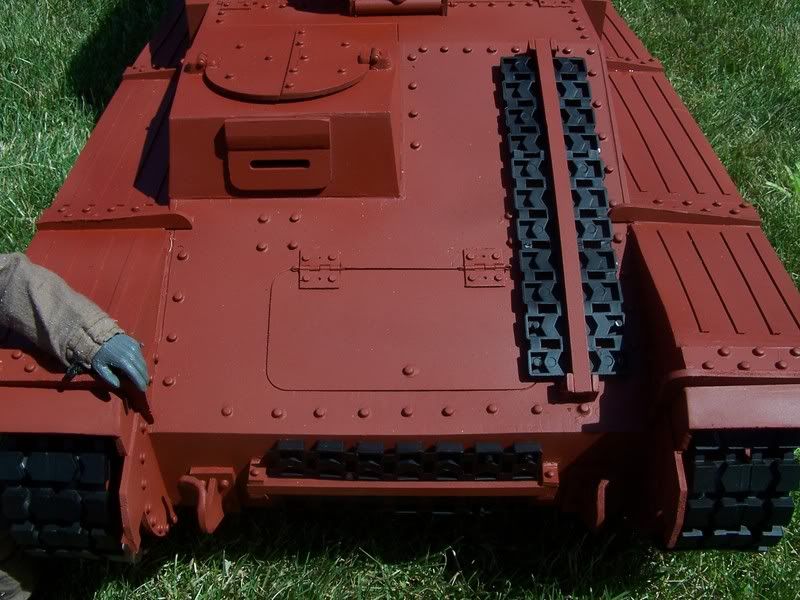
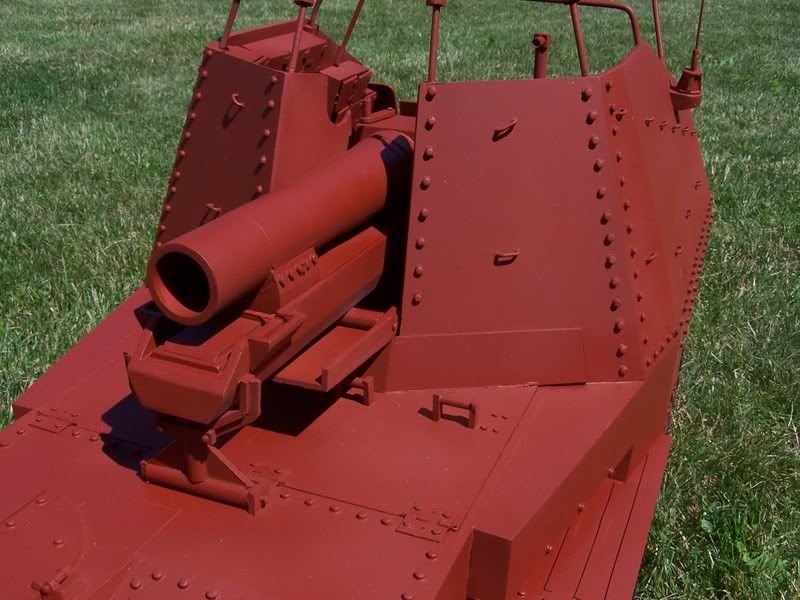
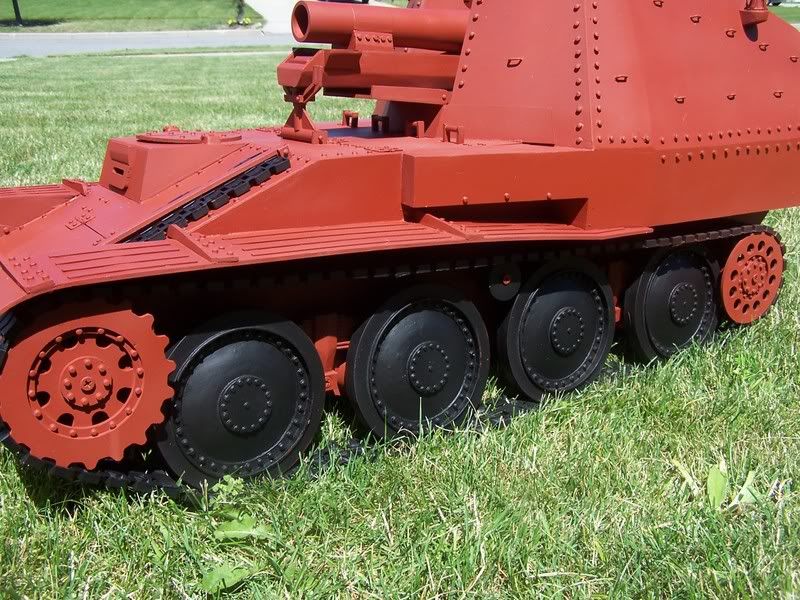
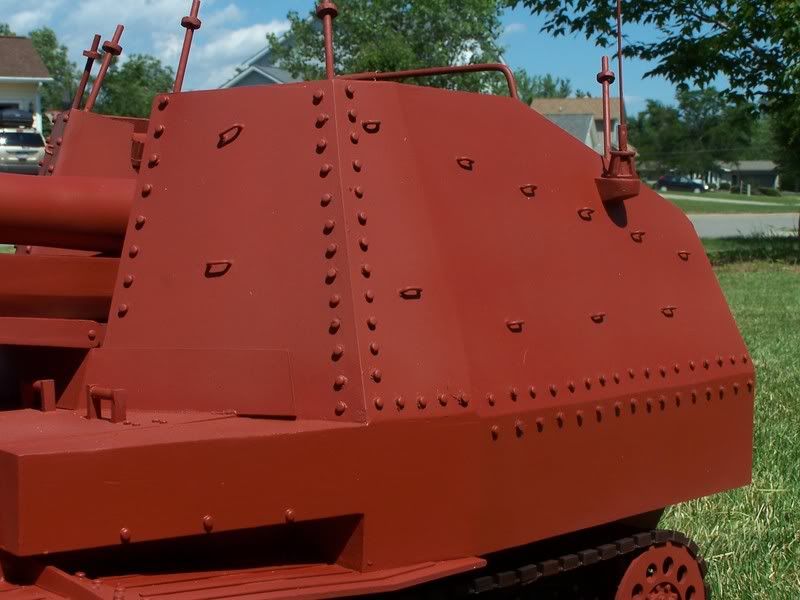
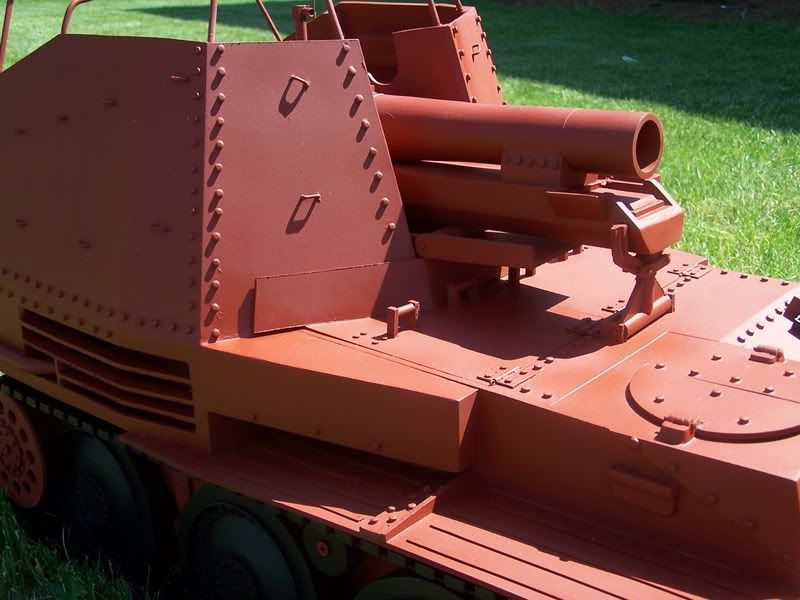
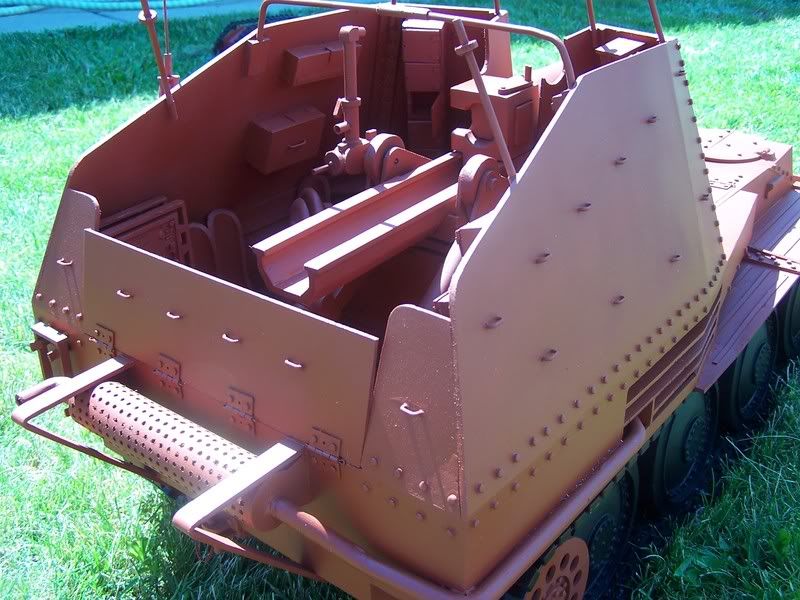
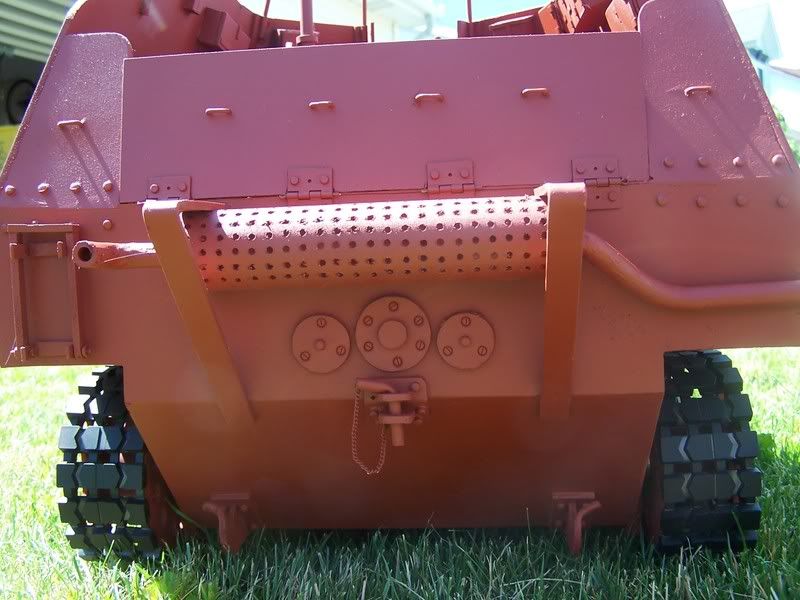
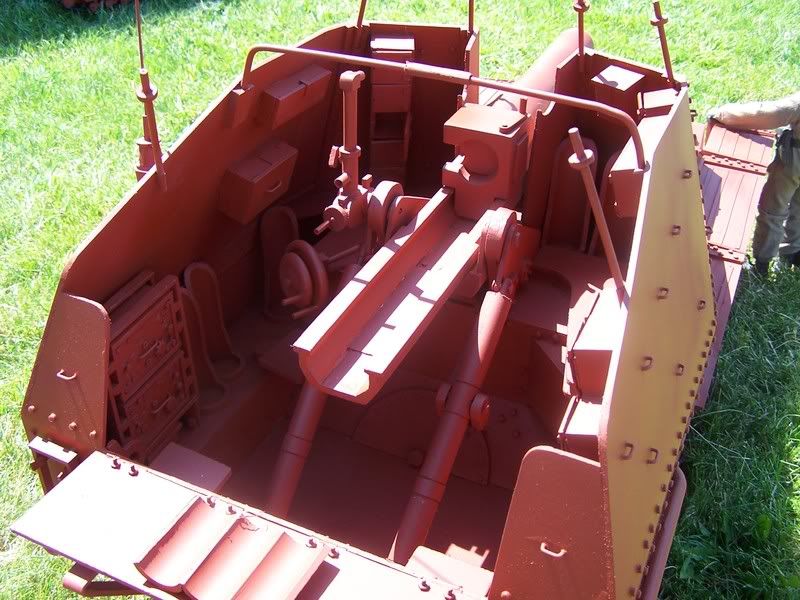
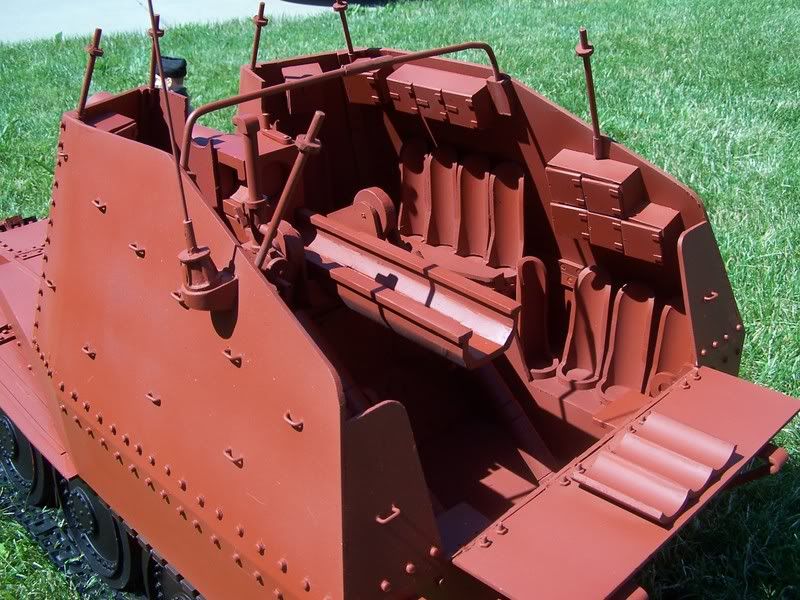
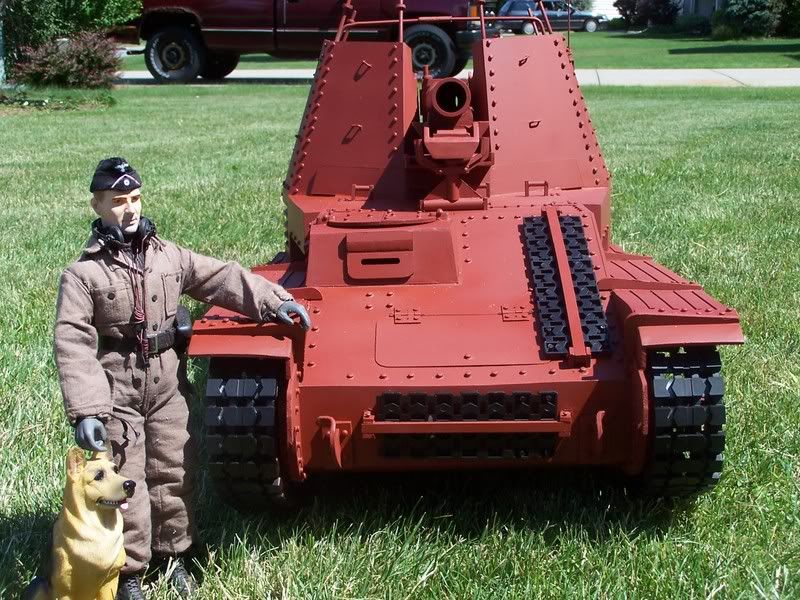
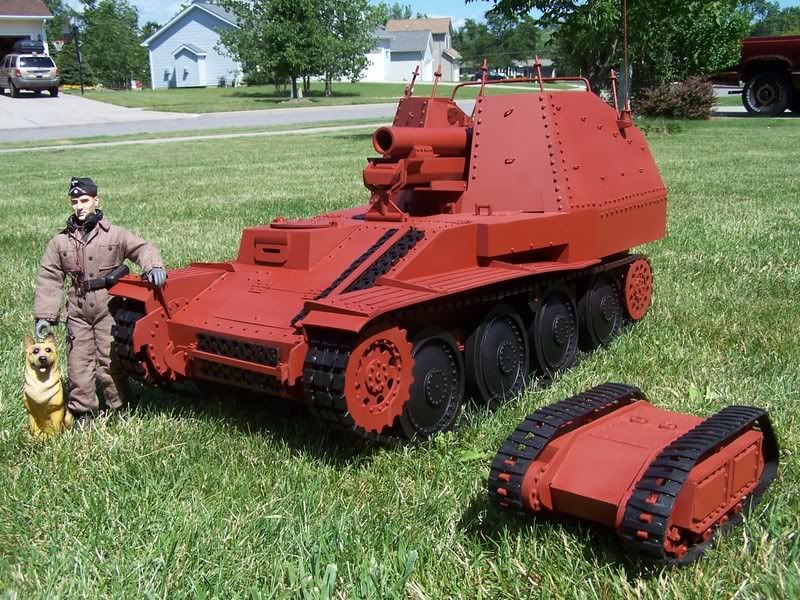
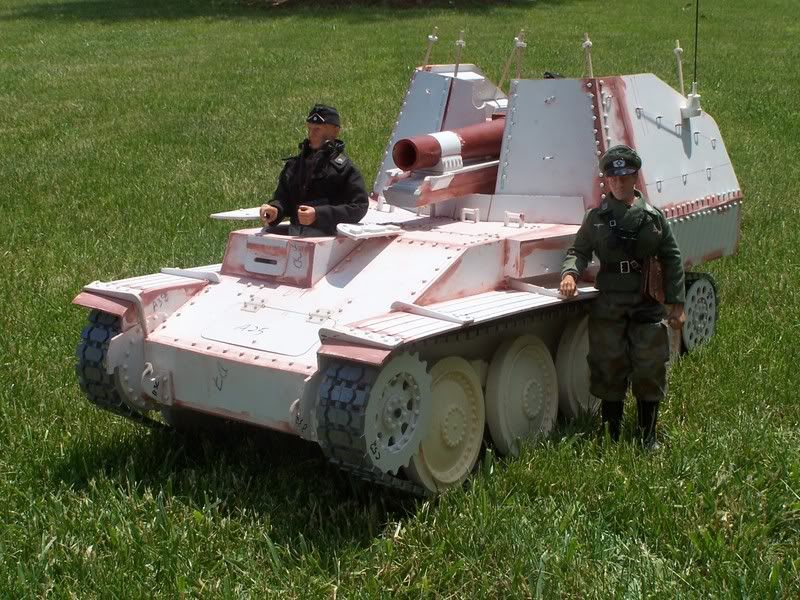
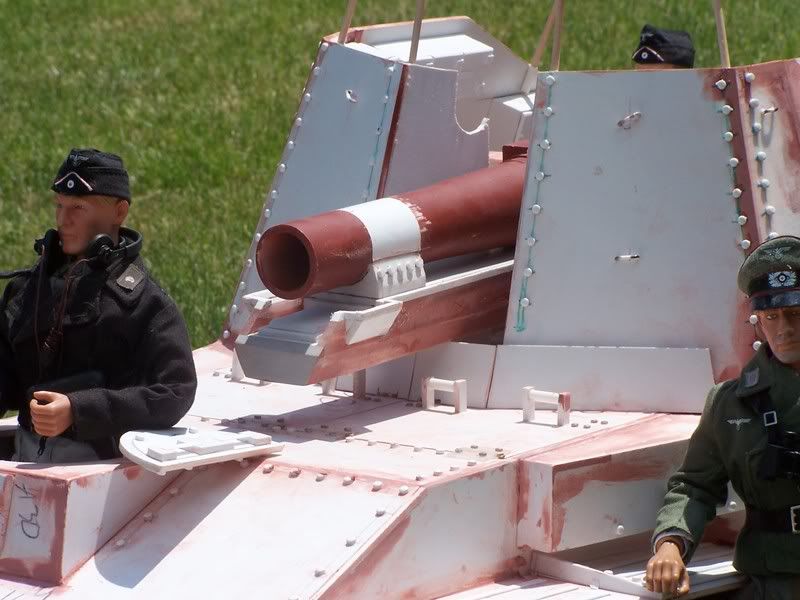
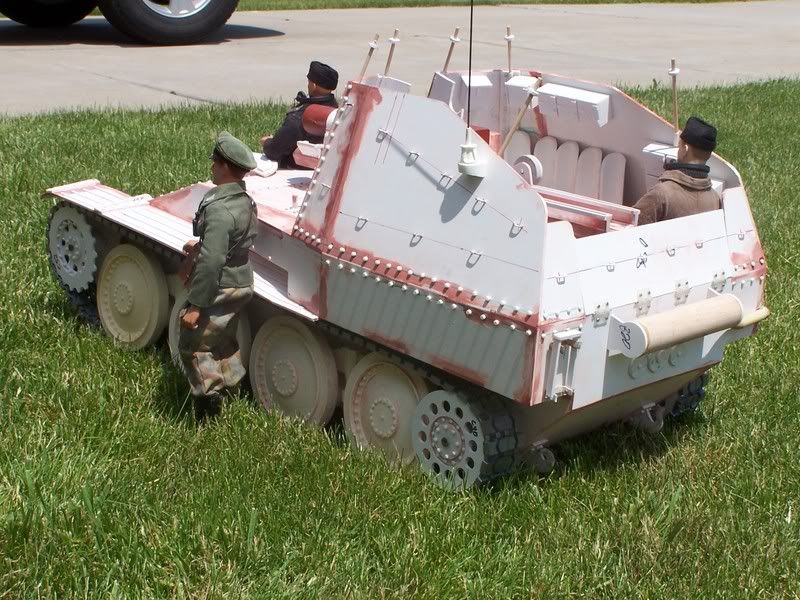
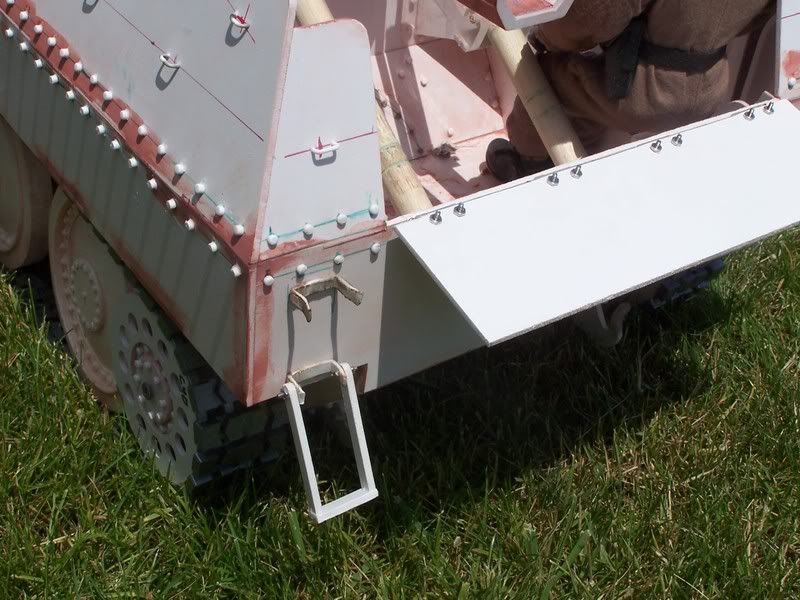
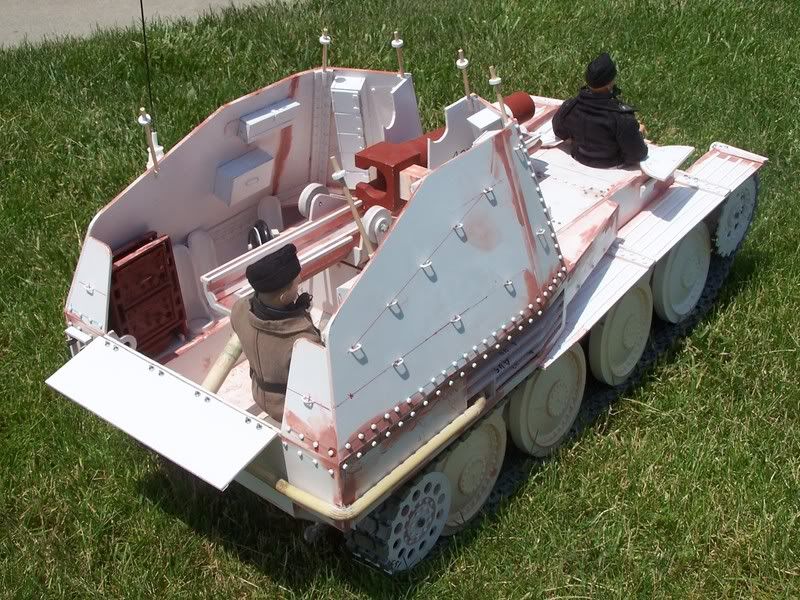
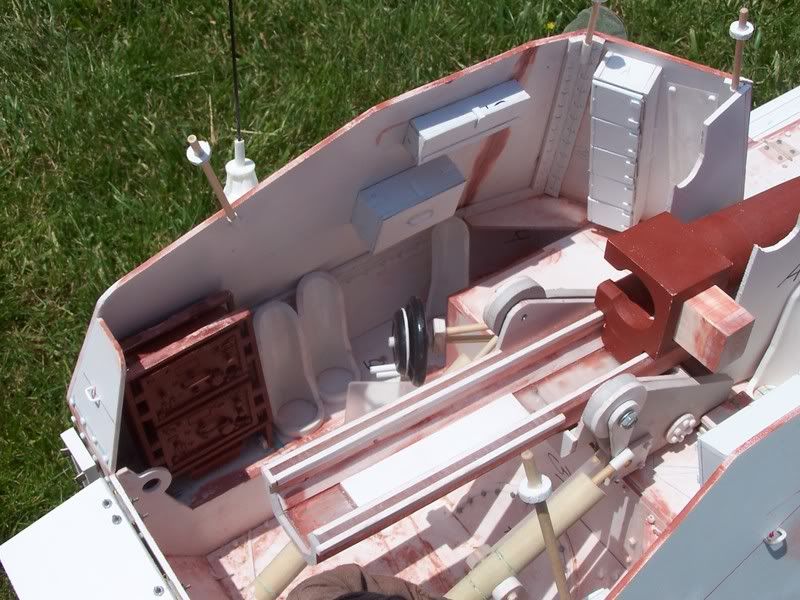
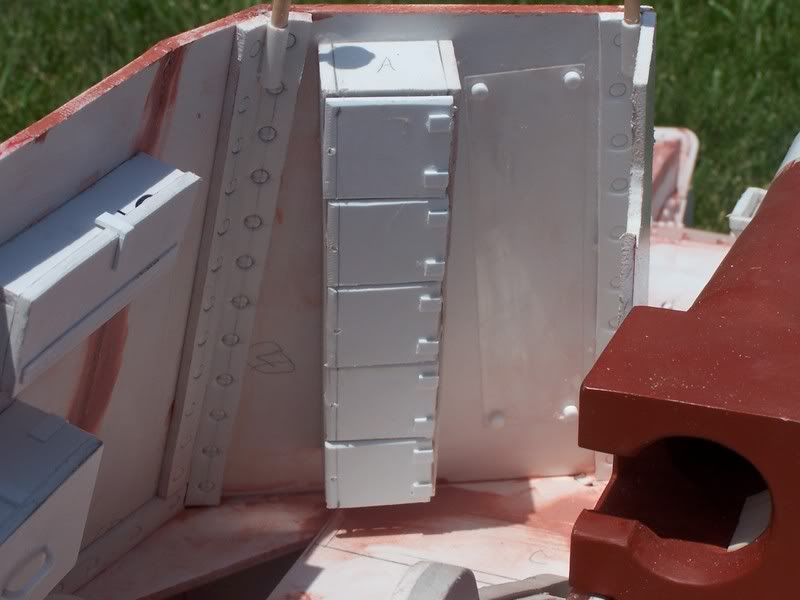
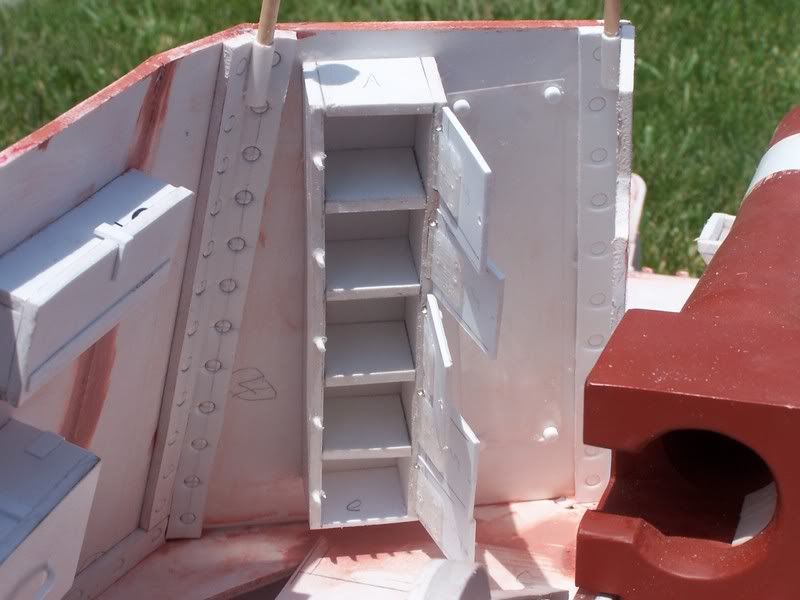
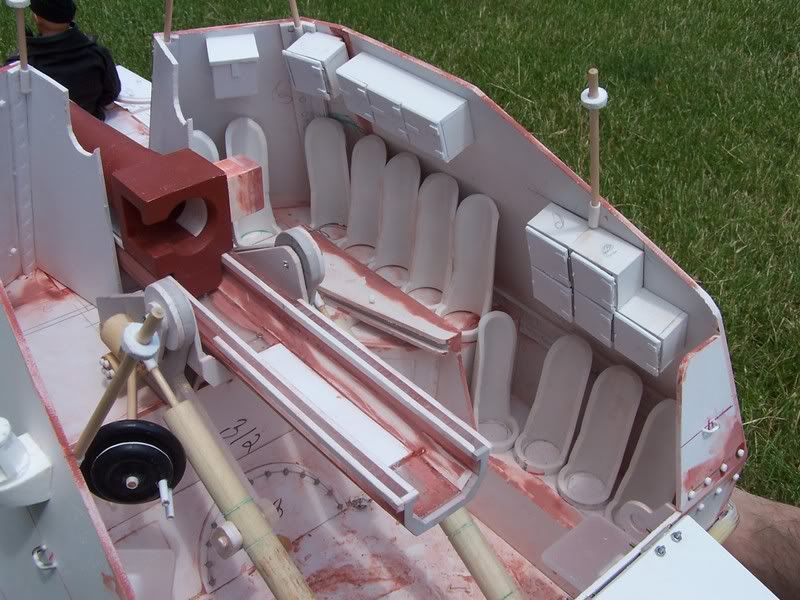
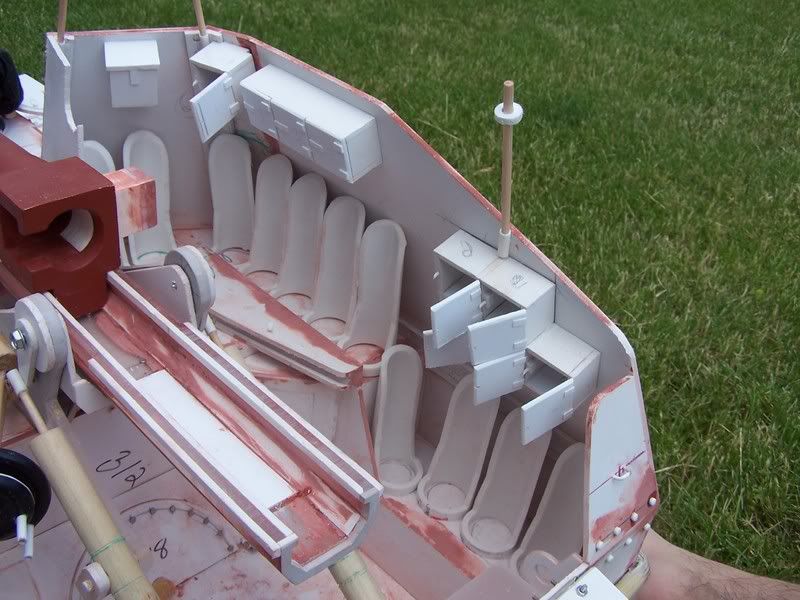
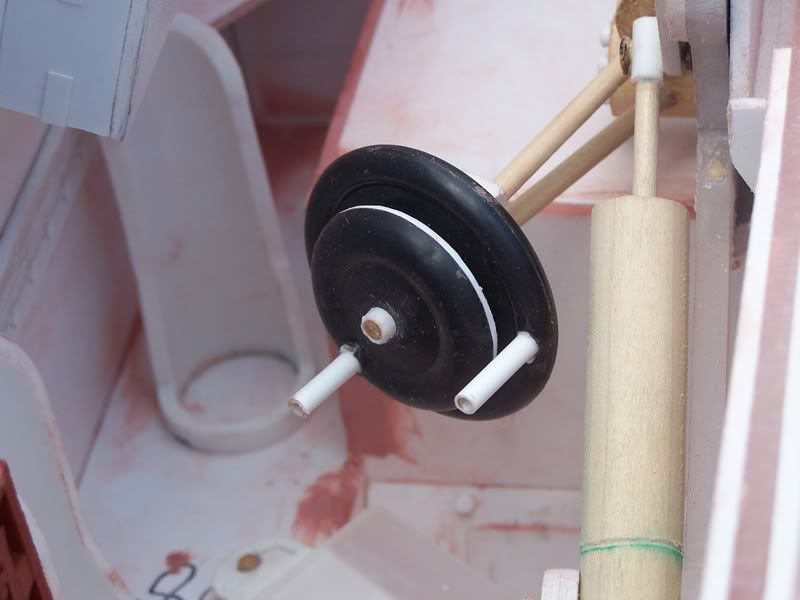
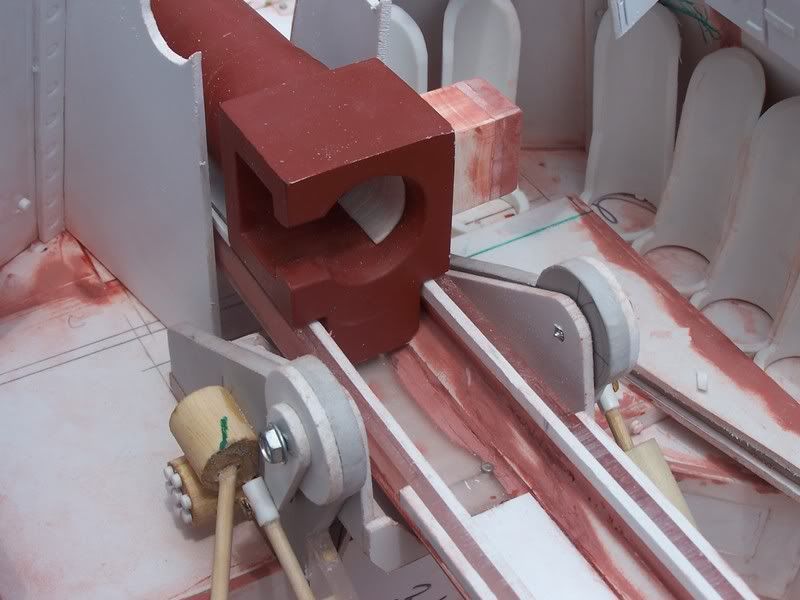
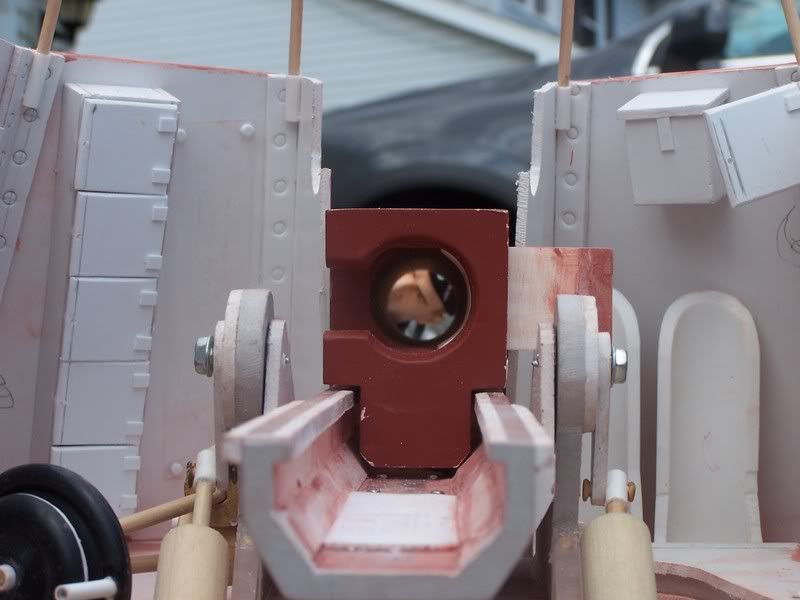
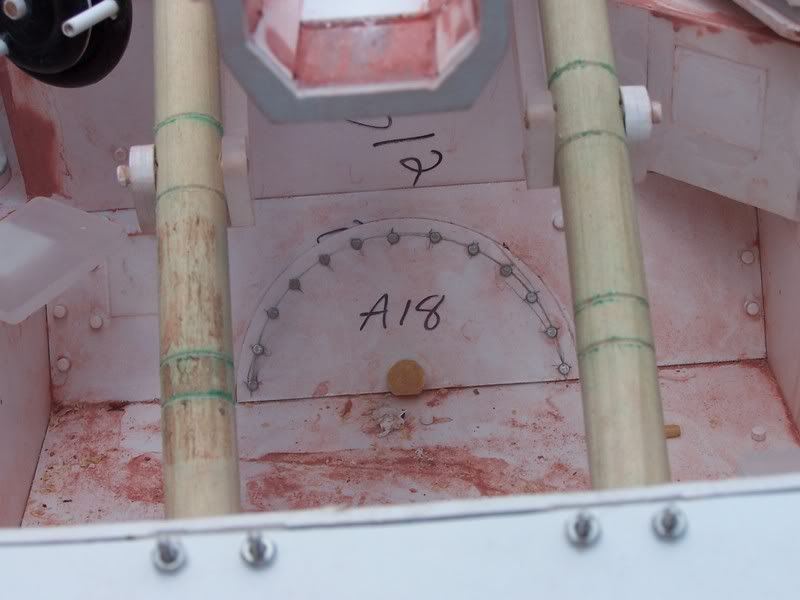
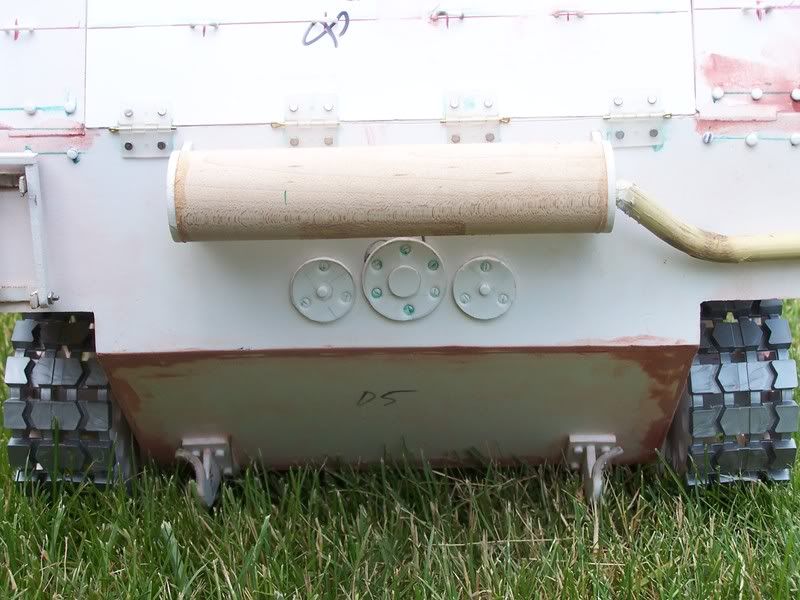
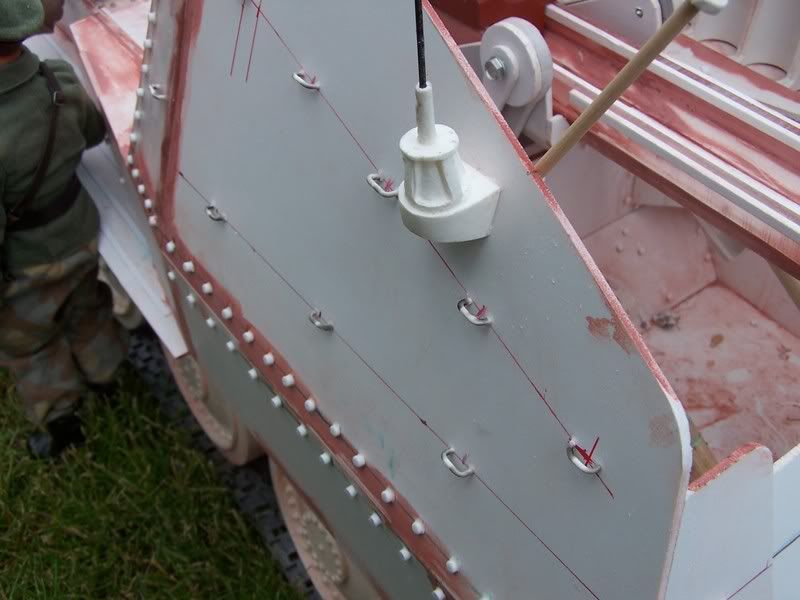
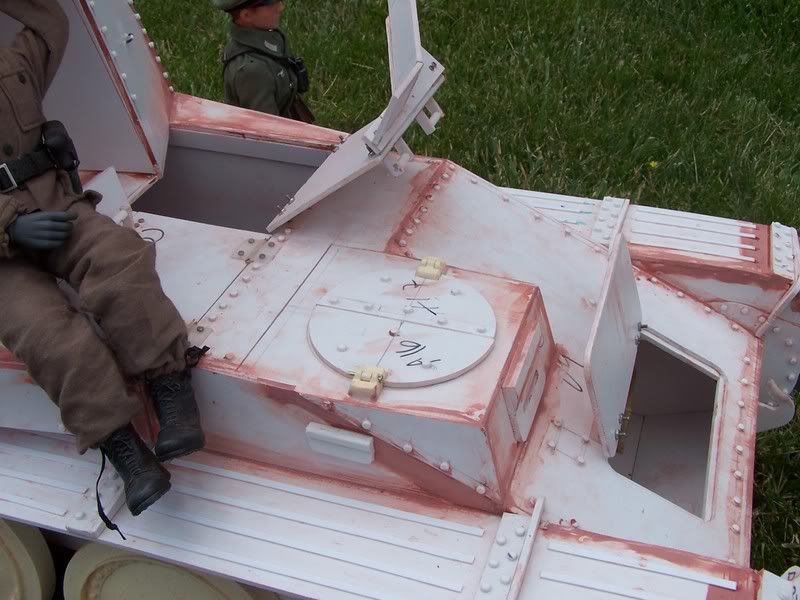
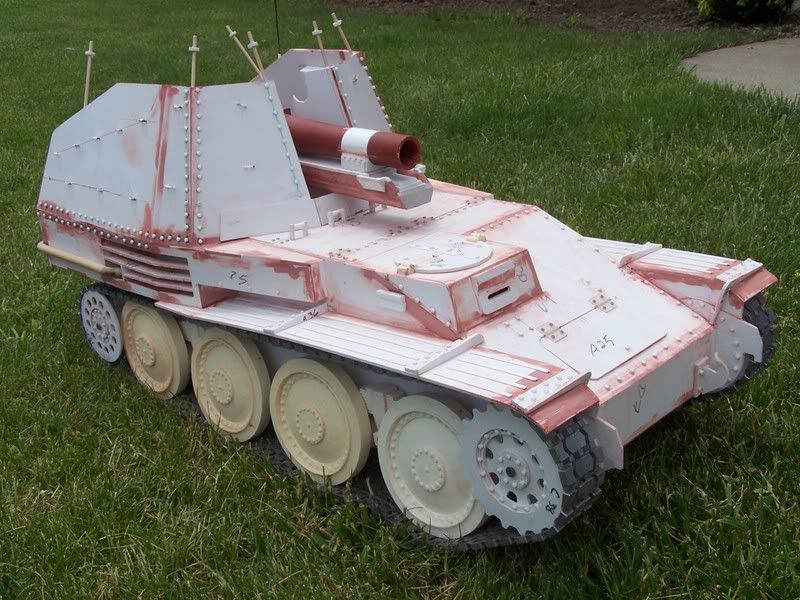
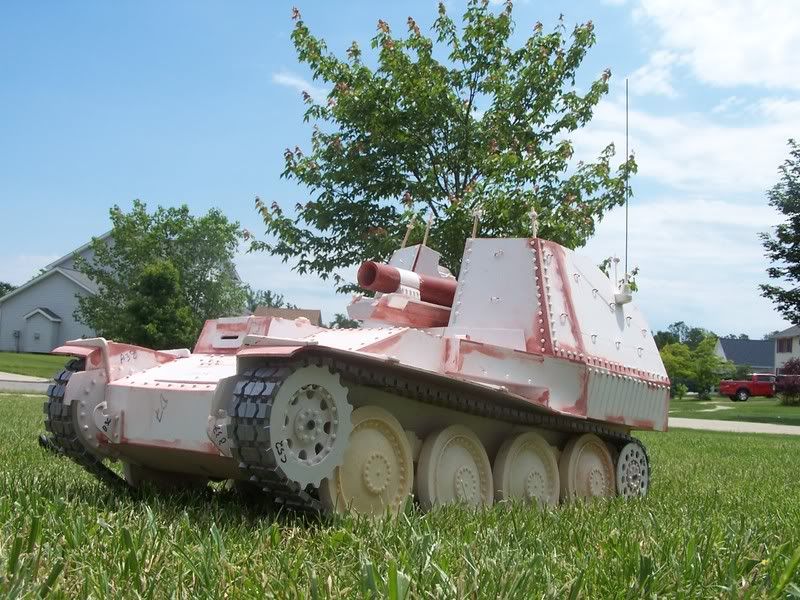
This is a work in progress vehicle I'm working on as a commission. There are a dozen or so details left to finish off. It is built on the chassis from one of the prototype Marder III M kits I had done. There were some problems with these kits so I kept them for myself (heck, I paid for them, why not use them?). Nothing majorly wrong that affected this build. The whole upper structure and crew compartment were scratch built. PVC pipe used for the barrel and ammo tubes. The cannon elevates but I have yet to put the gears on the underside of the cradle so it can hold its position; it does slide back in a recoil position. The elevation wheels are plastic wheels used on rubber band airplanes, they came 12/$3 or so and I couldn't pass that up. I have use my rivet method in lieu of bolts all over (too tedious!) and have accented with microfastener's bolts where more function was needed. Most of the nylon airplane hinges were bolted on in this way. All the pointy bits sticking out the top come off so they won't break during shipping. Wheels pivot on swing arms like I've done with my Marders. That's enough rambling, now for some pictures:
100_2736.jpg

100_2738.jpg

100_2739.jpg

100_2740.jpg

100_2741.jpg

100_2742.jpg

100_2743.jpg

100_2744.jpg

100_2745.jpg

100_2746.jpg

100_2747.jpg

100_2748.jpg

100_2749.jpg

100_2751.jpg

100_2752.jpg

100_2753.jpg

100_2754.jpg

100_2755.jpg

100_2756.jpg

100_2757.jpg

100_2759.jpg

That's where I have to leave off. I'm going away for a couple weeks and won't be able to work on this for a little while. Almost ready for paint but the details can bog you down...
 
Very nice looking! With that many angles, details, rivets, etc. you must have to have the patience of a saint! Great job!
 
Thanks to all for the compliments! I just got back so I can finally start working on this one again. At the moment I'm pretty sure I'll only be putting primer and a base coat of paint on this. Detailed painting will be up to the real owner or the guy who he paints with.

I do have more of these proto kits but none to spare. They're all mine! I know I'm greedy but they're worth more to me if I build them than sell the kits.

I'll update when I can...
 
Last detail pictures before paint. I actually started priming it already but took these ahead of time. Similar process as before. I used a plastic coat hanger for the exhaust, drilled a bunch of holes on the muffler. Track holders have a ridge on the inside to hold the JD tracks. Travel lock folds and has little pins to hold it up. Brass cross bar with slider to fold. The gun site extends and retracts, has a little screw handle. It is made of evergreen plastic, pvc, and mechanical pencil. Tow hitch has a little brass chain on it.
100_2760.jpg

100_2761.jpg

100_2762.jpg

100_2764.jpg

100_2765.jpg

100_2766.jpg

100_2768.jpg

100_2769.jpg

100_2770.jpg

100_2772.jpg

100_2776.jpg

100_2777.jpg


The Bondo putty likes to stain the plastics so it is not nearly as bad as some things look. The primer does tell a lot though so when that's dry I'll give this a going over with sand paper. Next time you see this one it will be in primer or paint...
 
Last pictures of this one. The new owner asked for it to be left in primer so he could paint it to match some others in his collection. It will be getting shipped off first thing next week. I'm giving it some time to air out and dry before sending it off. I think that's about it!
100_2794.jpg

100_2796.jpg

100_2797.jpg

100_2799.jpg

100_2800.jpg

100_2801.jpg

100_2802.jpg

100_2803.jpg

100_2804.jpg

100_2806.jpg

100_2815.jpg

100_2816.jpg

I threw the Goliath, Johan, and the dog in there for size reference. Before you ask, the dog came from the "Dollar Tree" $1 store and is polystone. I first posted pictures halfway through June but I've been working on this since early June. Having the kit to build on and the wheels already cast made this a fast build! Thanks for following along...
 
Back
Top