• Pardon the dust while the boys rebuild the site.

    The board will be in a state of disarray as I get things sorted out, for a little while at least.

    The new incarnation is using Xenforo as the system software. It is much like what we are used to, with a few differences. I will see about making a FAQ to help point out the differences for the members.


    One IMPORTANT difference for all of us old timers is that the 'mail' system is replaced with what are called 'conversations'/

    There is no 'Inbox' or 'Out box' or 'Sent' folders anymore.

    Think of Conversations as private 'threads' or topics that don't exist in a forum, that you start with another member. NOTE: Conversations can include more than one member if you or someone else in the conversaion, likes.
    Takes a little getting used to but I am sure you all can get a hang of it.


    Only a slightly modified default default Xenforo style is available for now. Once the new SAG style is ready it will be available.

    All existing users should be able to login with their usernames and passwords once the site goes up.


    If anyone has difficulties logging in please contact me at sixthvanguard@gmail.com.


    Thank you for your support and patience. I know it has been a loooong road.

Steyr 1500 A/1

fusilier1944

Company Commander
This is a new vehicle I'm working on. I've done the command car previously. Don't think that one was posted here but it is on the Sixth Division (Steyr 1500 A/2 Kommandeurwagen CLICK HERE)

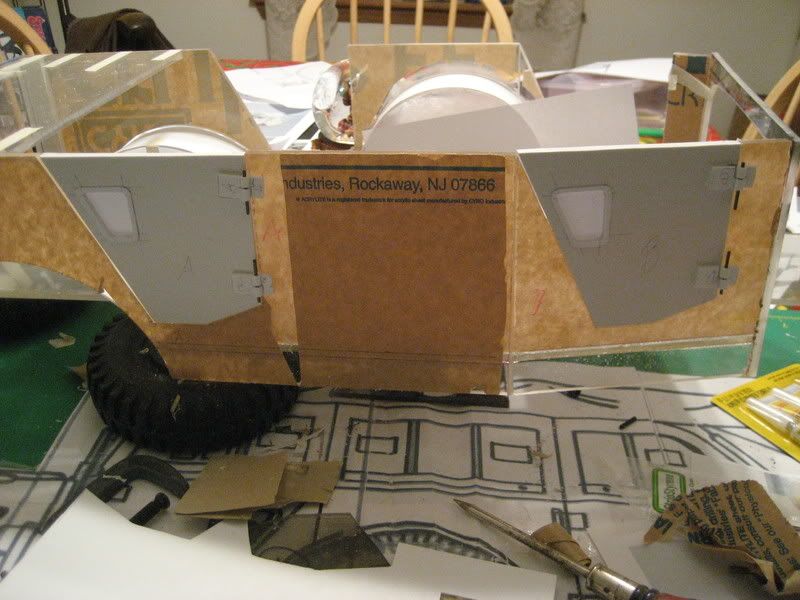
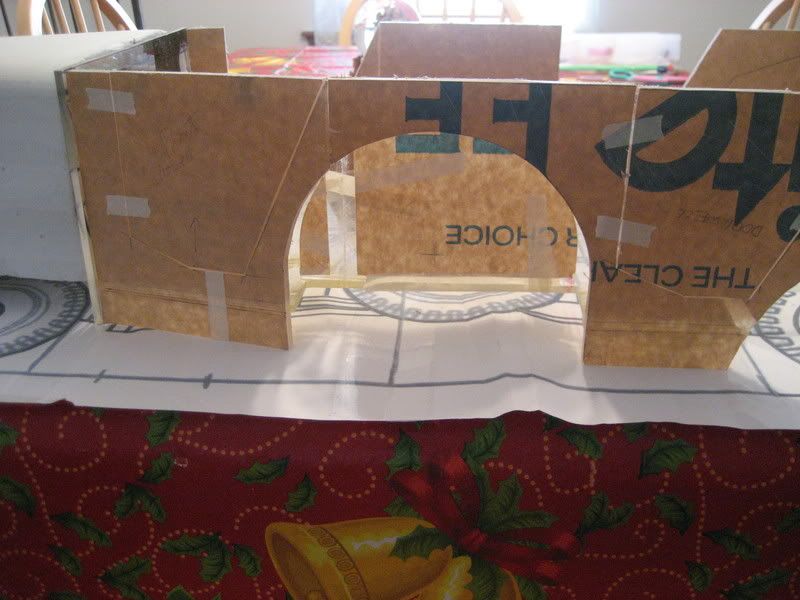
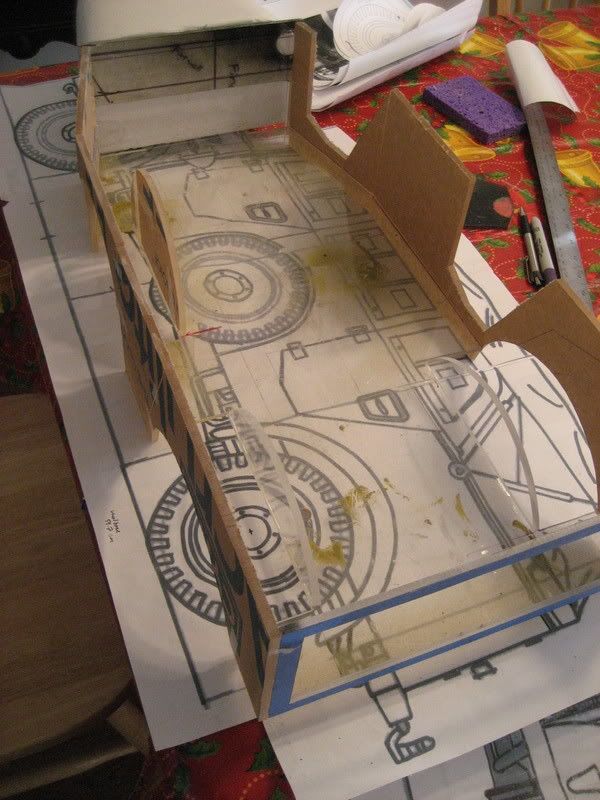
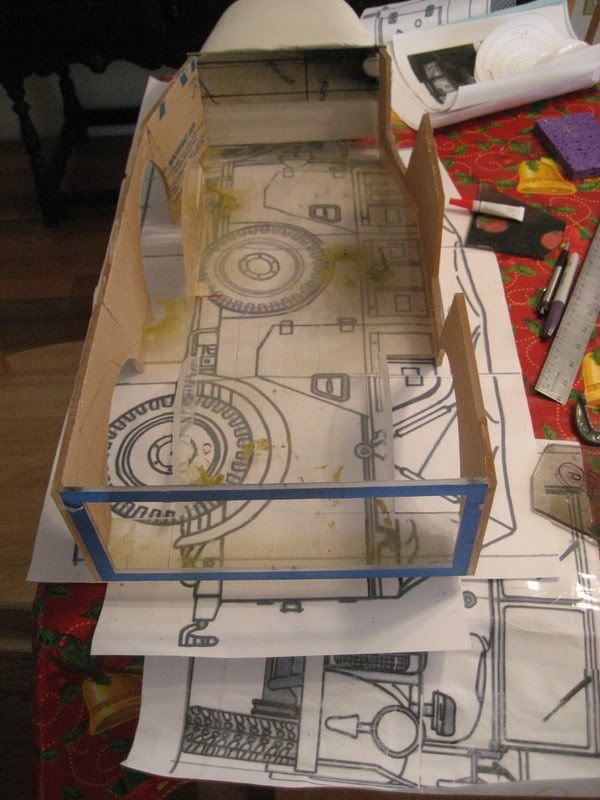
This is the regular troop truck version. So far I'm building it out of 3/16" and 1/4" Acrylic/plexiglas. I plan to use wood to do the frame underneath. Detail work will be with plexi, styrene and PVC. I'm going to mount either 6" lawnmower wheels or some DeSimone GI truck wheels that I have. I'm going to look for some PVC pipe end caps to use as replacement hubs in the wheels. On the command car I used sculpey to make forms to cast wheel hubs with resin and I'm not doing that again.

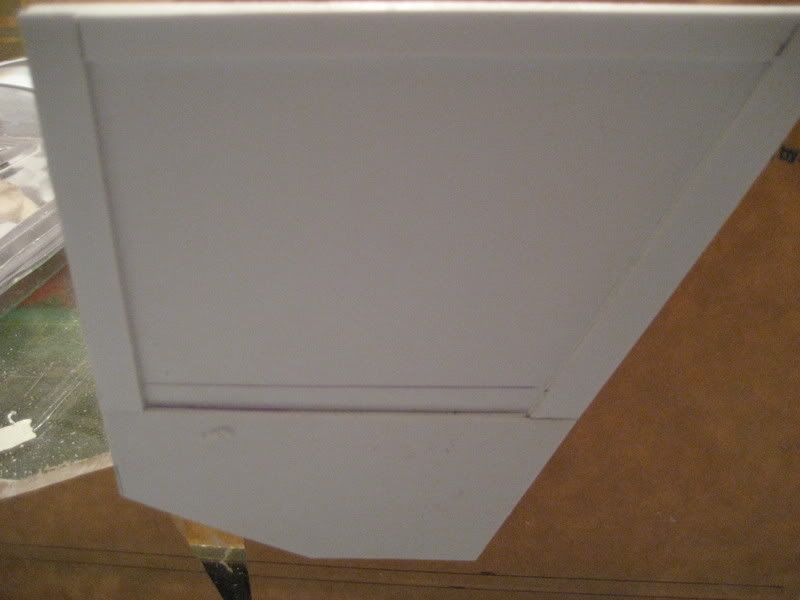
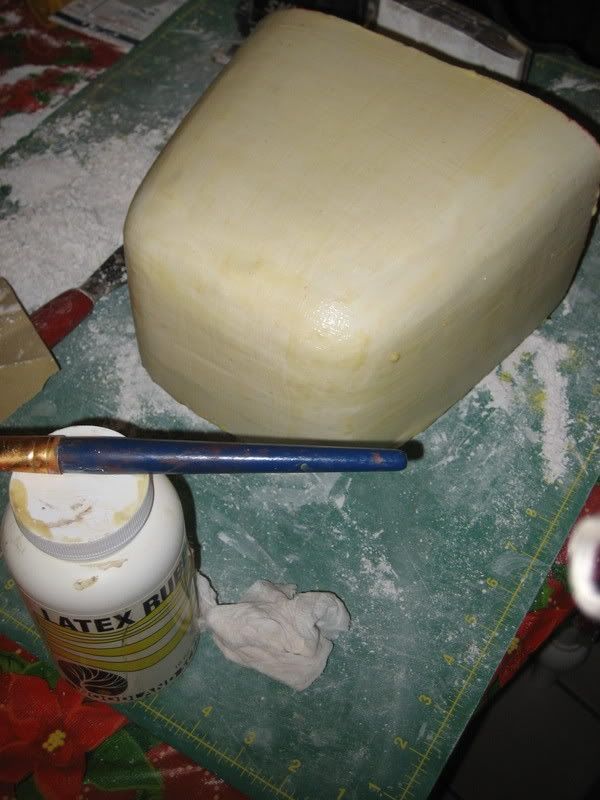
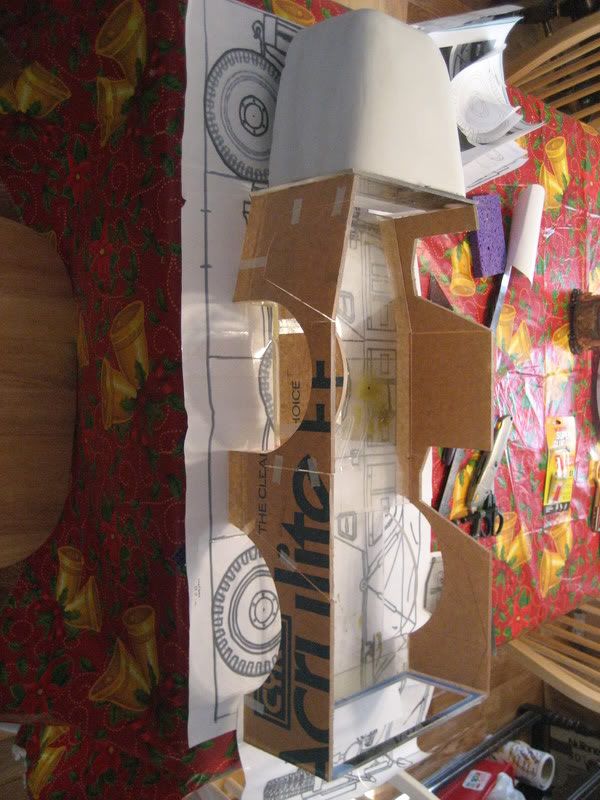
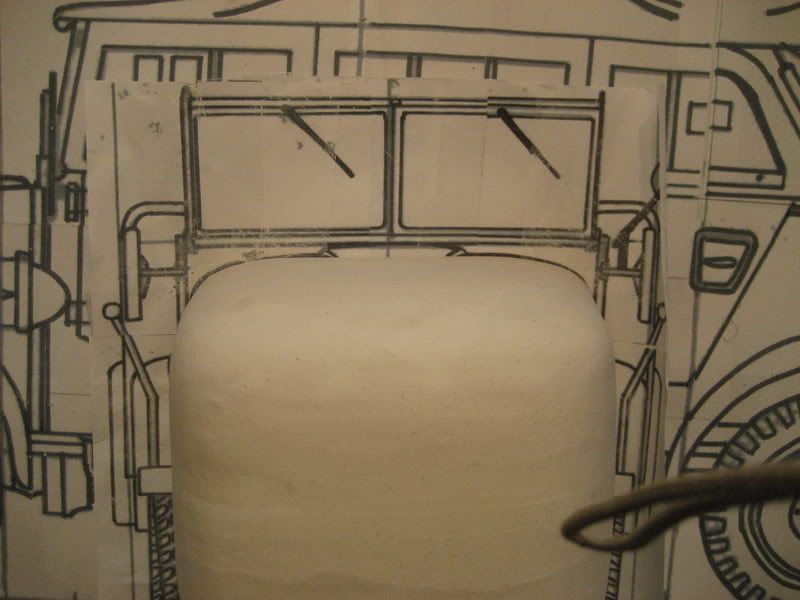
The big pieces of this one are the hood and the front fenders. Previously I built framed fenders and sanded the hood down from layered plastic. This time I'm going to try fiberglass. It will be the second time I've worked with fiberglass but the first time I've done it alone. I plan to mold it over plaster of paris forms. The big white thing on the front end is the form for the hood. I think I need to remove some more material to account for the stuff that will be formed over it. Hopefully this will go easier and make much less of a mess. I haven't gotten to the fender forms and I don't look forward to making them symmetrical/mirror images of each other.

IMG_0466.jpg

IMG_0469.jpg

IMG_0467.jpg

IMG_0468.jpg

IMG_0470.jpg

IMG_0471.jpg


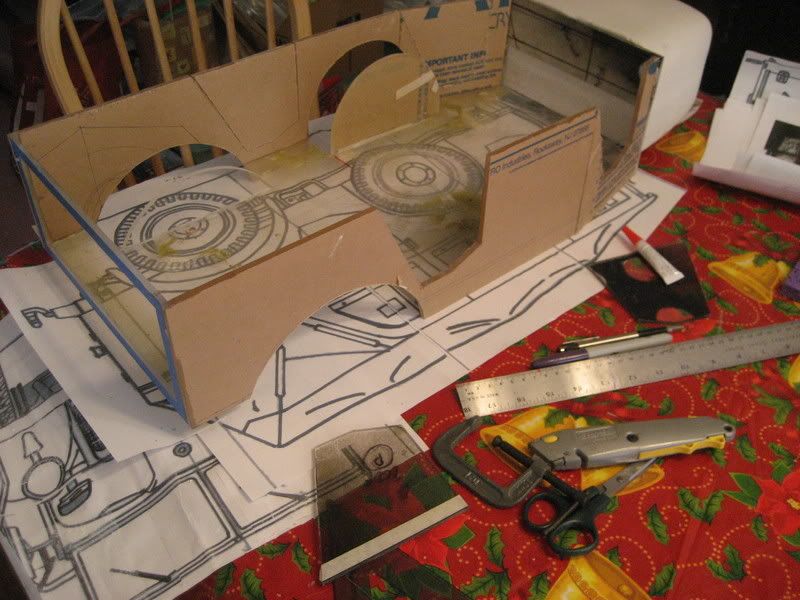
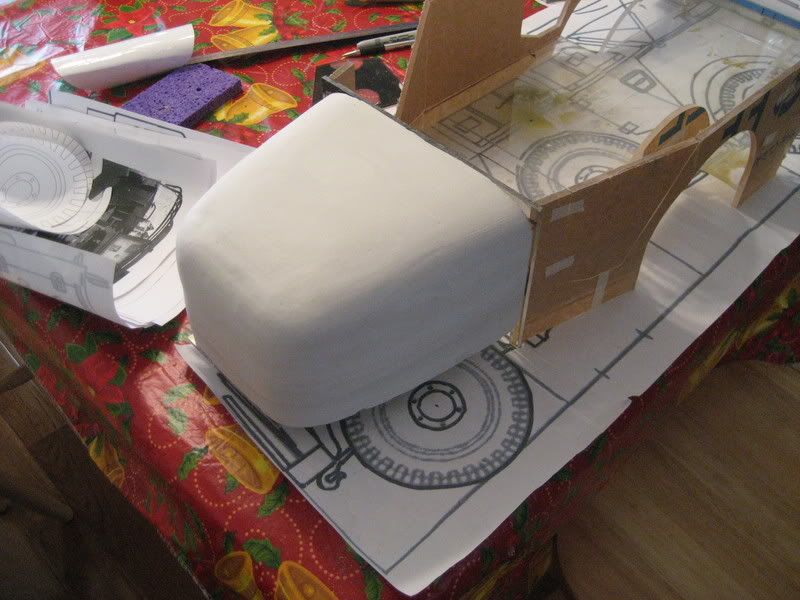
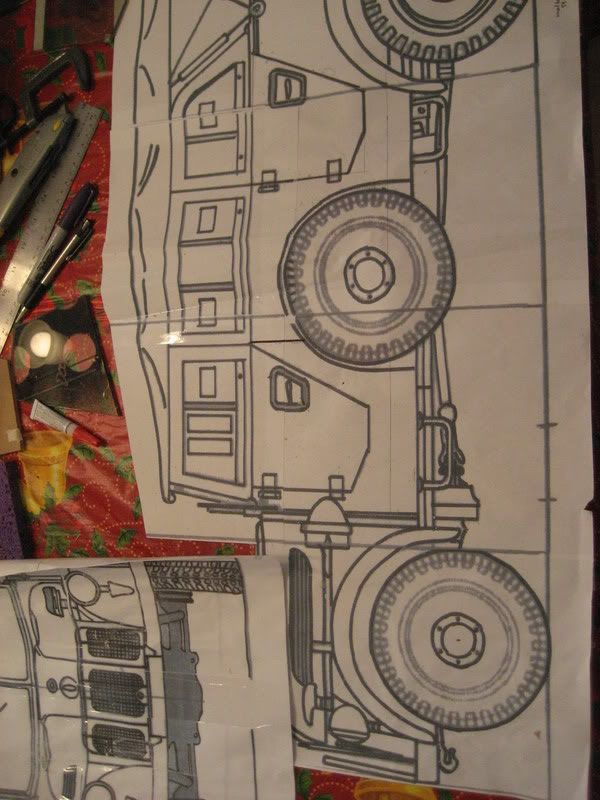
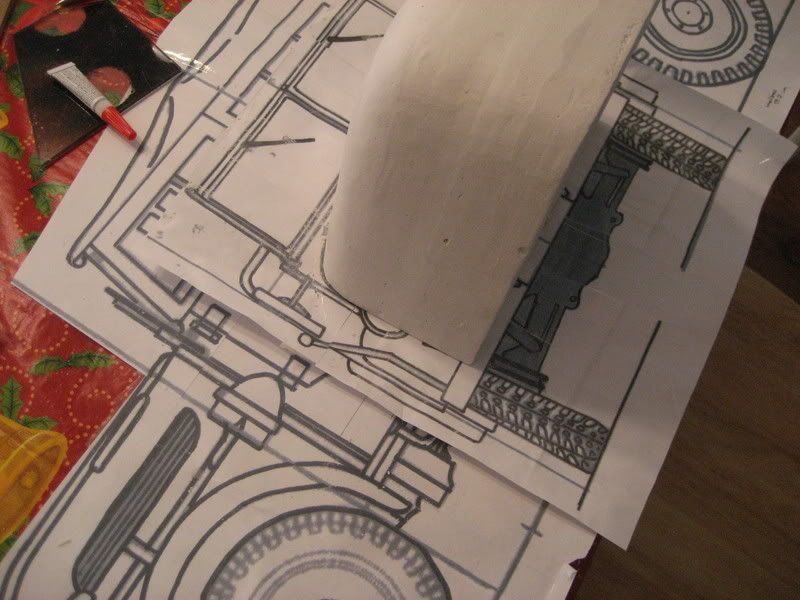
This is also the first time I blew up a multi-view drawing to work off of. One thing I learned is that it helps to have all the views be the same scale in the first place. I ended up wasting quite a bit of time before I realized my front and rear views were a different scale than my side view. I had to scale them three times; 1st to 1/35 scale then 400% of that (the largest my printer could do), refine the lines with a Sharpie marker, then scale to whatever % got them up to 1/6. Pain in the butt though a grid I drew on the paper helped me scale them nicely with each box on the grid becoming 1 page of paper. Here're some pics of the views and how I got the plaster block to shape working on the front view
IMG_0474.jpg

IMG_0472.jpg

IMG_0473.jpg
 
wow that is an excellent choice of project very interesting vehicle very unusual im all for that i look forward to your projects progress :!: so far its looking good.
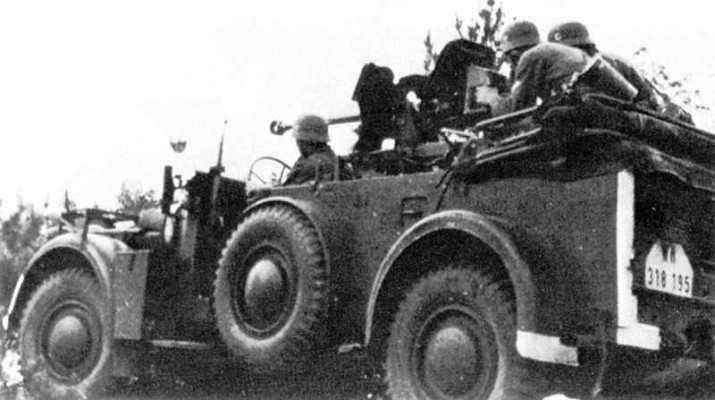
 
That is going to look great can't wait to see it as it comes along. I keep trying to think of what I want to build next.
GB
 
Looks like you are off to a great start :!:
Keep us posted.
Here is a idea for you............


vehicle
normal_2.8spzb41.jpg
 
amazing vehicle
for my vehicle and possible your new project here , you can find on ebay ash trays with rubber tires around - a hint to make it easier
here my steyr1500
aa85nh.jpg

aa115bg.jpg

here in action as our forum made a dio
dscn0565ak6.jpg

if you need more pics let me know regards siegi
 
he219u: Nice Steyr! I like the winter camouflage. I would like to see the interior of your vehicle. Do you have any interior pictures? Your group's outdoor diorama is impressive. I will keep watch on ebay for the tires.
 
Awesome work! I always liked that vehicle and your work.

How does that clear acryllic work for vehicles? I used to make display boxes with it ages ago but never actually thought of using it for a vehicle. I have a source for it fairly cheap. :) I never had luck scaling up smaller drawings with out 1:1 reference and lots and lots of wasted paper. LOL I will be very interested in seeing your fiberglass work I never liked working with it myself because it really bothers me I can't work with fiberglass insulation with out itching for days.

I saw your post on the 6th I love it!

he219u, Great pics, I loved that winter photo shoot. I saw those dam ashtrays at one of the local wholesale novelty distributors and never even thought they would be useful in 1/6th. Usually I would have picked up on that. Next time I am there I'll have to see if there are any left. Good catch :!:
 
I like working with Acrylic though it gets heavy for things like tanks where resin running gear already weighs a lot. I actually chose to use it this time as the stuff I had was of the thickness I wanted and I had it on hand. It cuts well on my scroll saw. Chips fly everywhere which makes cleanup somewhat easier, well easier than fine dust all over the place. If the blade is dull or I feed too fast it will gum up like styrene does. Nothing is better for windshields!

Today's progress was the passenger side doors. These are upvc outers with styrene layered inside. The layering is how I got the recessed door handle area. I made my hinges off a picture and now I wished I'd done them flipped vertically. The way they are, the door's weight will rest on the pin instead of the hinge flange.

Also added some latex to the hood form so the fiberglass won't stick to the plaster. I see one of three things happening here: 1) fiberglass goes on the outside and that's my hood so the brush marks won't make a difference (positive mold), 2) the latex stays in the fiberglass and allows me to lay fiberglass inside of it like a negative space mold, 3) it all sticks together, makes a mess, and I move on to a different approach for the hood with all that work in the garbage. Probably 70% chance it's #3.

IMG_0477.jpg

IMG_0478.jpg

IMG_0479.jpg

IMG_0480.jpg

IMG_0481.jpg
 
I love the styer , Bought a kit and upgrade resin kit to do a 1/6th version , but money and a bad economy put it on the back burner , Great work !!!! I really cant wait to see it finished !!
 
Softskins are my weakness. The Germans had several I wish were made in 1/6 scale. I have the Horch 1A kit from Jason. I think the Steyr is great! I'd like to see the Horch kfz. 15, the Steyr 1500, and the horch 1A mass produced by someone.

Looks like its a fun build. As for using acrylic. I have a 251 D in acrylic sheet. It broke in half in shipping like the titanic, but with US glue it went back together well . Its heavy but not to bad. It will break if thrown around. cuts fairly well.

Great job on the build !
 
One thing I noticed while looking at reference pictures is that this particular Steyr has a body similar to the large Horch, everything behind the windscreen at least. Now the reason for this? Apparently Auto-Union manufactured several of the 1.5 Steyr models. Incidentally, I'd guess there was some overlap in production. I'm almost tempted to build a second body while I'm at it since I know what everything looks like. I'll certainly be making myself some templates so I haven't wasted any insights.

As for the acrylic being brittle and breaking I agree, somewhat. That really depends on the thickness. I haven't had any issue with anything thicker than 3/16" breaking. My favorite is the "frosted" surface. Stuff glues nicely and paint adheres well to that. If you build things with the proper reinforcements it isn't an issue. I'd be afraid of this one pulling a Titanic if I wasn't putting a hardwood frame underneath. It would be very weak in the doorwell areas. Mmm...stress concentrations...
 
I think that the similar bodies on the Steyr and Horch 1a is due to the einheits-programme - wich was made to standardsize the bodies of lots of commercial wehicles brought into the army.
Captured wehicles like Morris trucks was also outfitted with the same body.

The reference picture with the pz büsche 41 is very interesting - wonder how it is fitted on the body?

Looking forward to seing more progress - I have a Horch1a project on the shelf (for many years now).

Henrik
 
Always interested to see work using fiberglass. Sounds like a viable method for those rounded surfaces but I've never had the courage to try.
Can anyone recommend any tutorials??
Your work always looks great. Look forward to your progress.

Thanks
Scott
 
M37M880";p="130120 said:
Is this the beast.....


This pic came from a 1/18 post on great German photographs.

TTT

this is the horch personal carrier and not the Steyr version - can be indentified by the different shape of hood ...

here is also shown the early body which was equipped with a spare tyre on each side - the later ones only had the spare-wheel on the drivers side
 
Awesome! Another great vehicle project I've kicked around. I have a ton of detail photos inside and out of one these in pristine condition, if you are lacking any detail pics let me know what your looking for and there's a good chance I will have the pic.
 
I've made some fiberglass airplane cowl's in the past using 2 different methods. Method 1 I made the plug from laminated wood carved, smothed and varnished then made a plaster mold. Wont do that method again! Method 2 I made the plug from styrene blue insulation foam (pink works just as well) about 1/16" smaller in all dimensions and then used epoxy finishing resin and glass cloth. After a second coat of epoxy it was smooth as glass. Last step is to desolve the insulation form with lacquer thinner. You could also make an epoxy mold and then layup polyesther and glass, the polyesther wont stick to the epoxy but you still need a few coats of car wax rubbed in as a release agent.
 
Back
Top