armorpax
Battalion Commander
Hi All,
I have time and again been asked "how do I add welds" so have taken the opportunity whilst working on the Stug to try and put together a quick tutorial. This is not the only way to do this but is the method that works for me so here goes!
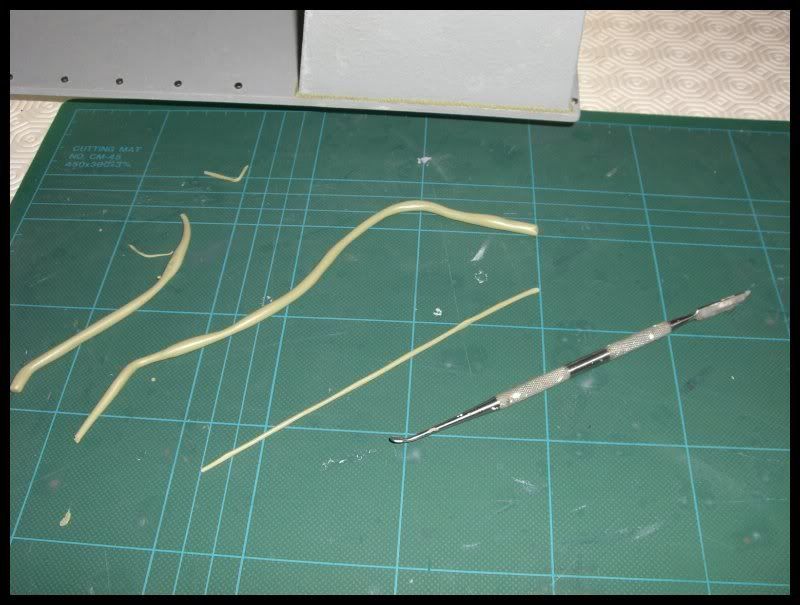
All my welds are added using Standard Milliput although any grade works just as well, the reason is the greener colour makes it stand out more than the whiter grades and therefore it is easier to see what you have missed.
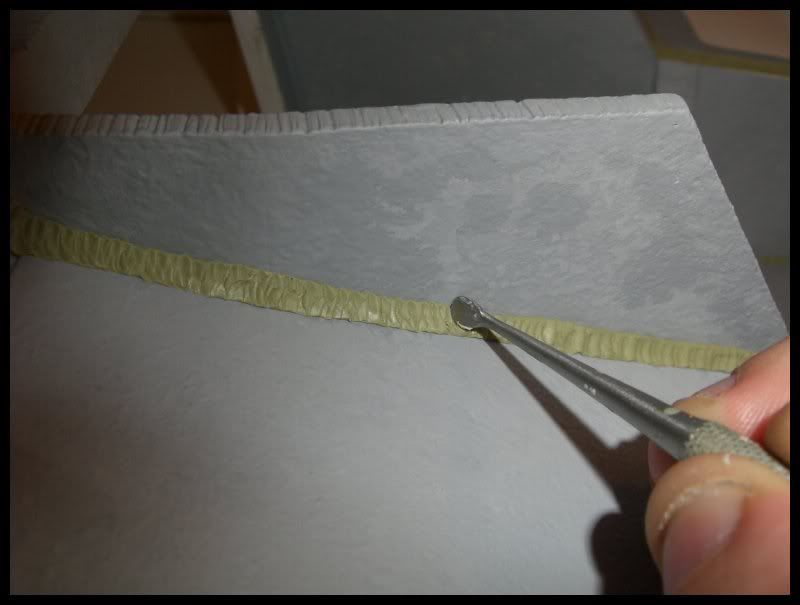
I use a dental probe for adding the texture although you can use the end of a paint brush handle if it is flattened off.
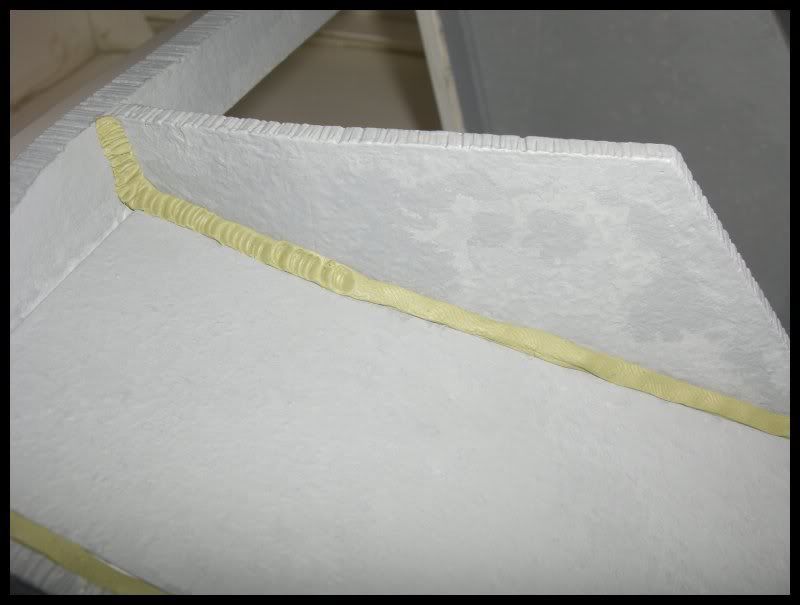
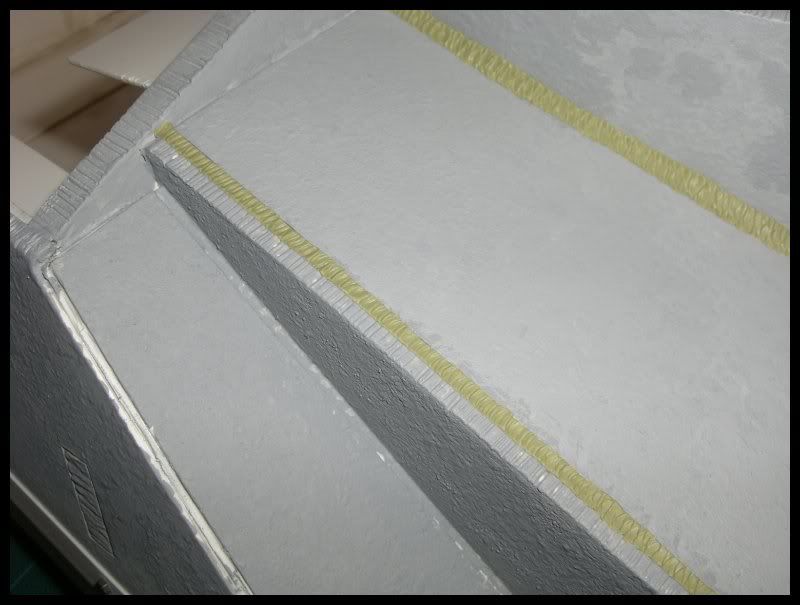
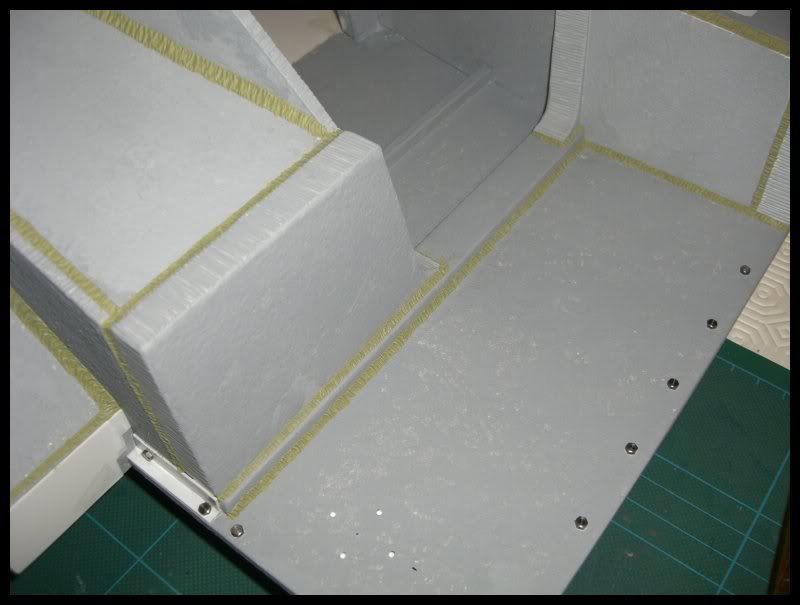
Once you have mixed your milliput roll it out into a series of long sausages as shown in the pictures, these need to be rolled down until they fit the groove or angle you going to add the weld too.
You have about 1 hour to work the milliput before it becomes to stiff so don’t mix too much at once!!!
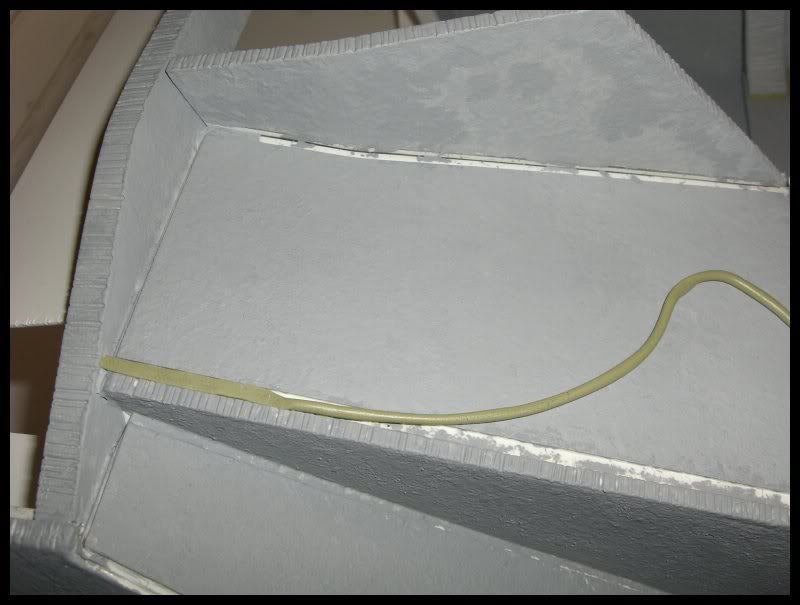
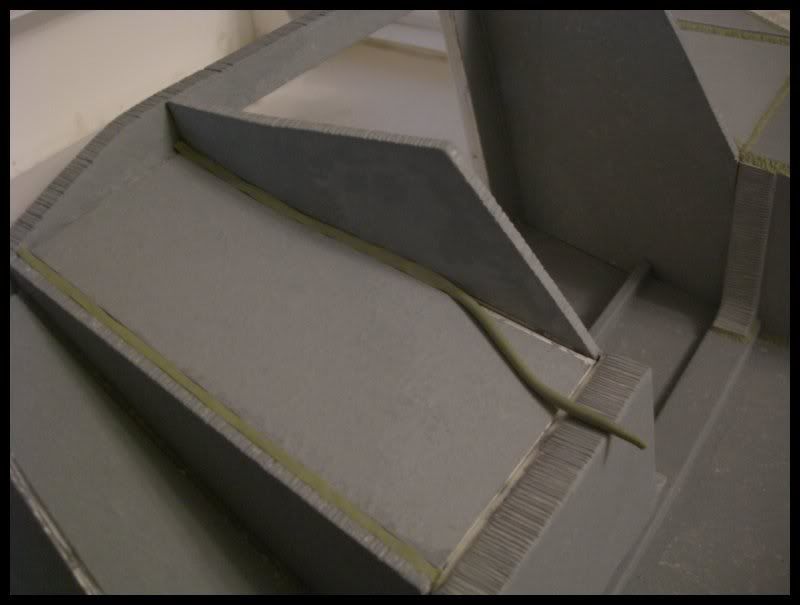
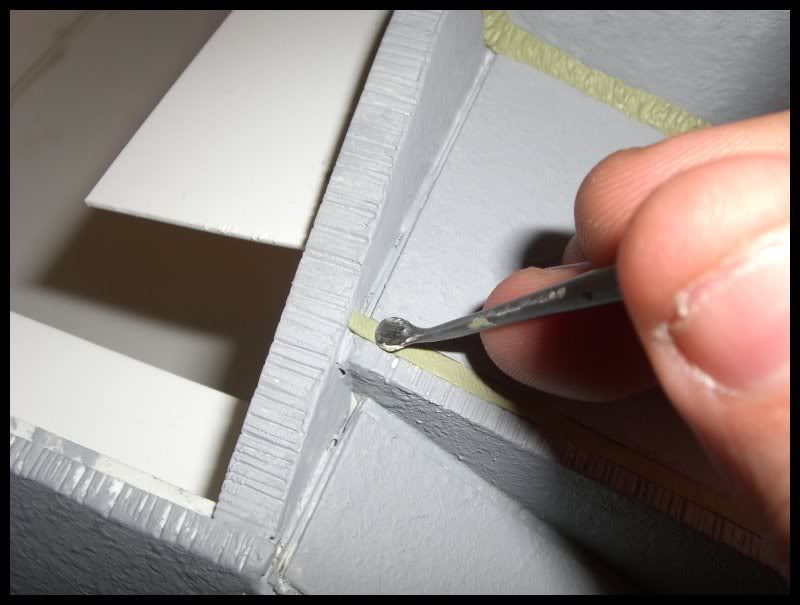
Push your milliput into the groove or angle and make sure it is pushed right in so it keys to the plastic otherwise you will find it pulls out when try and add the texture.
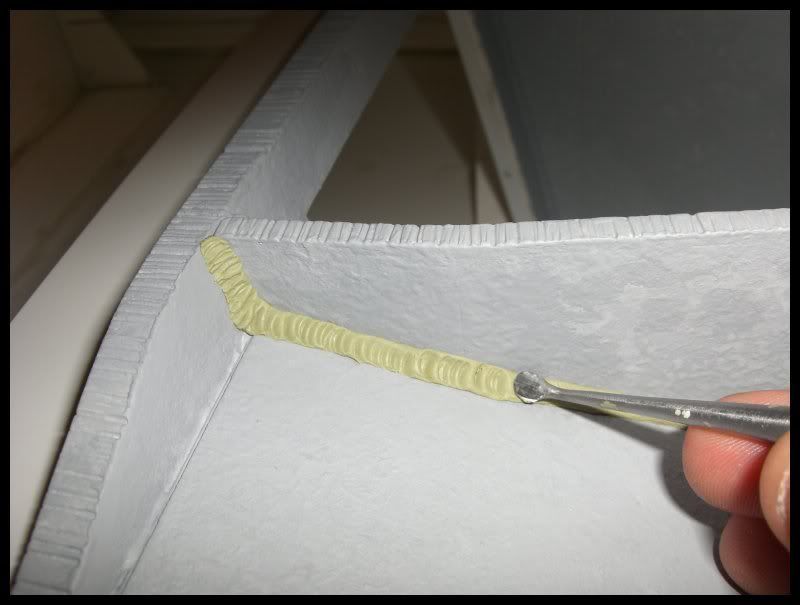
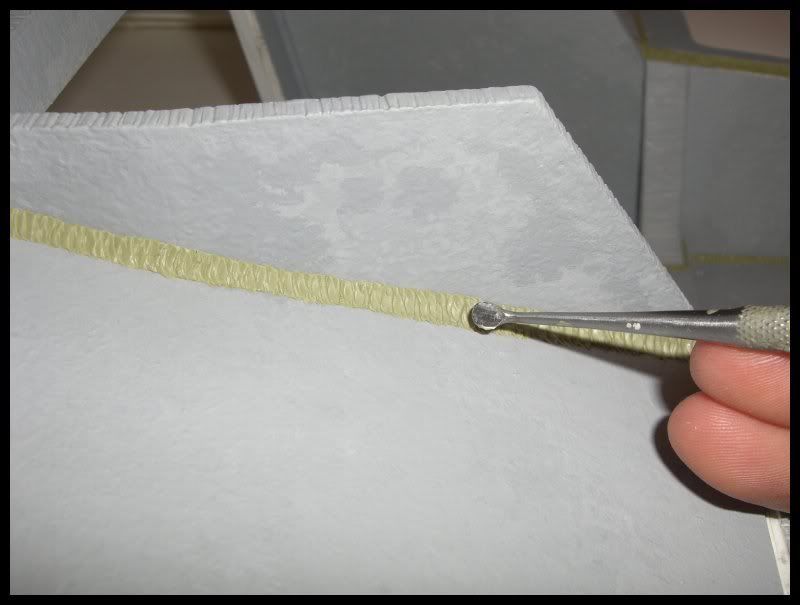
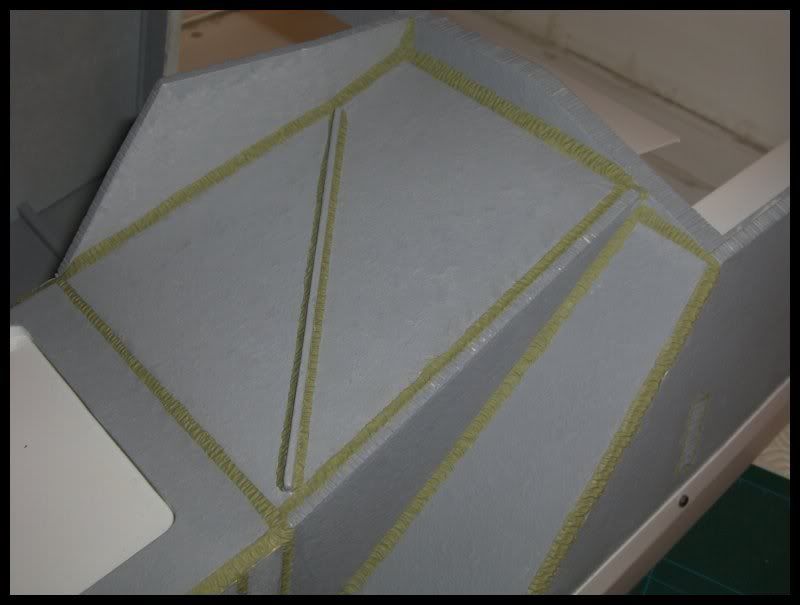
Using the end of the dental probe start to push "weld pools" into the milliput working all the way along the weld. Don’t worry too much at this stage about the edges but concentrate on getting the middle of your weld looking right.
Once you are happy with the middle start doing the same all the way along each edge making sure you don’t leave a gap between the underneath of the milliput and the surface of the model.
When I am happy that the edges are all blended into the model surfaces I normally go back down the middle again just to make the weld more random.
If it doesn’t work straight off just keep working on it until it looks right.
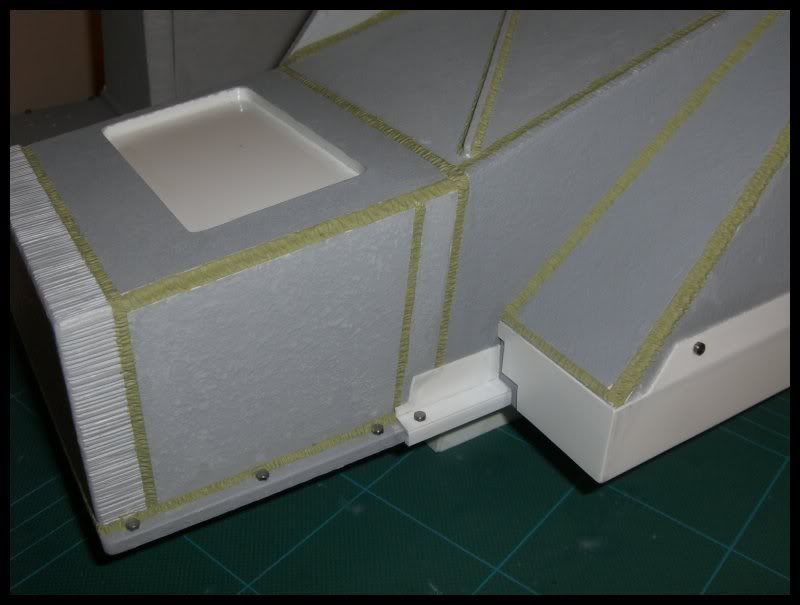
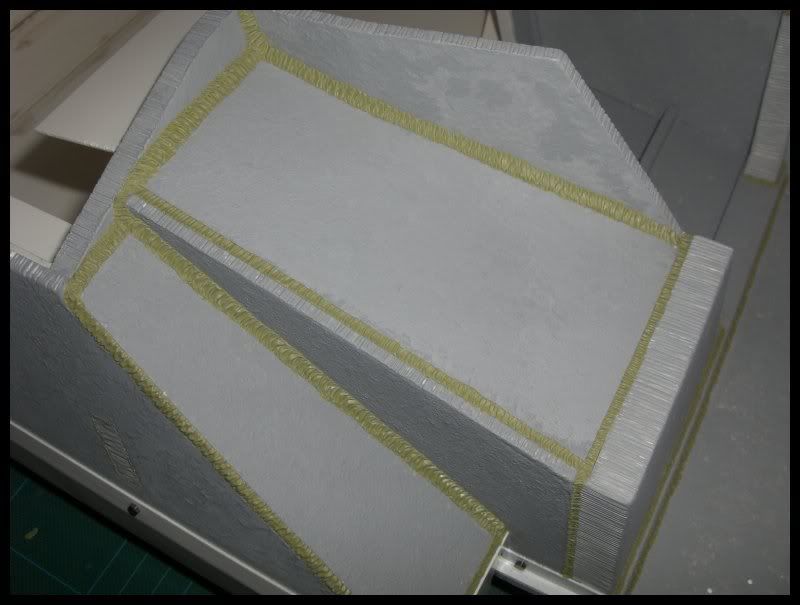
Finally here are some finished examples.
Hope you find this useful and happy welding!!
Best regards
Dave
I have time and again been asked "how do I add welds" so have taken the opportunity whilst working on the Stug to try and put together a quick tutorial. This is not the only way to do this but is the method that works for me so here goes!
All my welds are added using Standard Milliput although any grade works just as well, the reason is the greener colour makes it stand out more than the whiter grades and therefore it is easier to see what you have missed.
I use a dental probe for adding the texture although you can use the end of a paint brush handle if it is flattened off.
Once you have mixed your milliput roll it out into a series of long sausages as shown in the pictures, these need to be rolled down until they fit the groove or angle you going to add the weld too.
You have about 1 hour to work the milliput before it becomes to stiff so don’t mix too much at once!!!
Push your milliput into the groove or angle and make sure it is pushed right in so it keys to the plastic otherwise you will find it pulls out when try and add the texture.
Using the end of the dental probe start to push "weld pools" into the milliput working all the way along the weld. Don’t worry too much at this stage about the edges but concentrate on getting the middle of your weld looking right.
Once you are happy with the middle start doing the same all the way along each edge making sure you don’t leave a gap between the underneath of the milliput and the surface of the model.
When I am happy that the edges are all blended into the model surfaces I normally go back down the middle again just to make the weld more random.
If it doesn’t work straight off just keep working on it until it looks right.
Finally here are some finished examples.
Hope you find this useful and happy welding!!
Best regards
Dave
 Thanks for the tutorial on your welds Dave, good pics and great explanation. Hope to put it to use some day.