TBowman
Company Commander
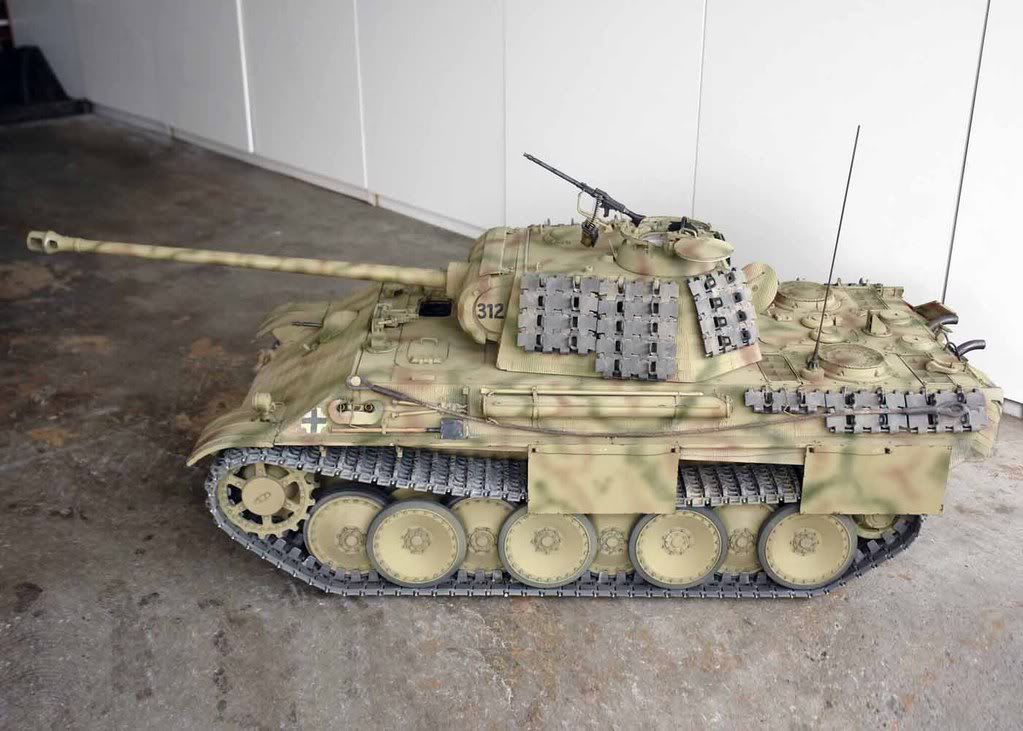
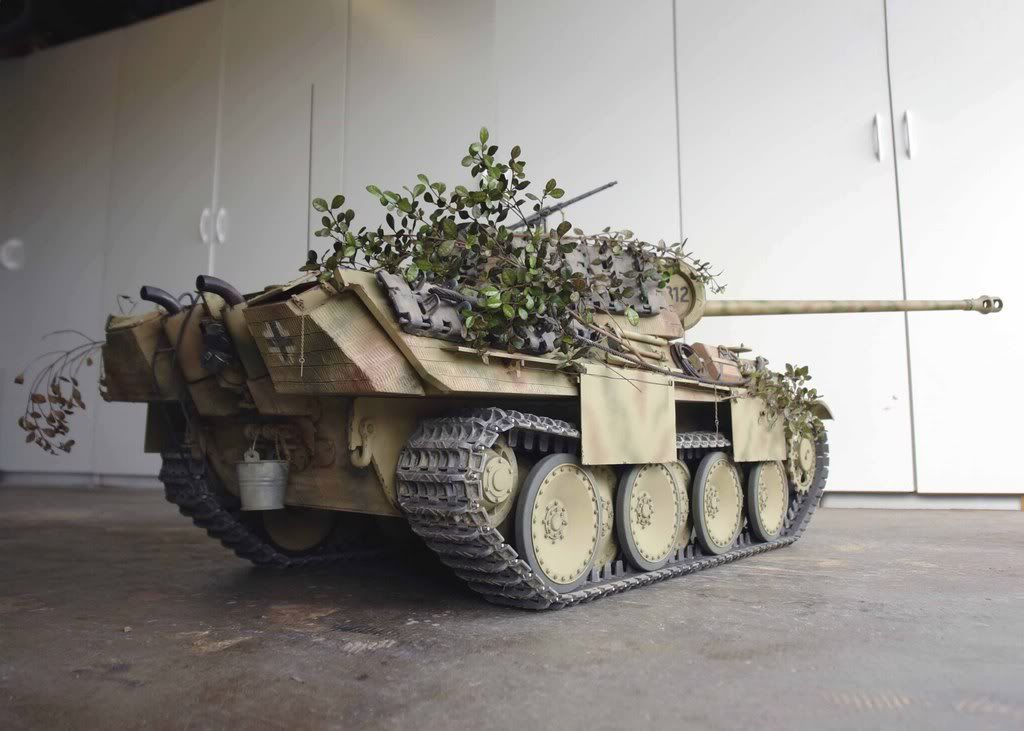
This Panther is one of Armortek’s late Ausf G Kit’s that has been modified to represent an early/mid production Ausf G attached to 1 SS Panzer Corps in the Orne valley during the summer of 1944.
I’ve been working on this model for two years and had never intended to do the extent of detailing I did. However, once I started making parts more accurate to a Normandy time frame Panther Ausf G, I found it was very hard to stop at just one part. I also found I enjoyed the customization and accurate detailing part of the build as much, or more, then I enjoy the RC part. The parts are a combination of modified, Armortek parts, custom designed and built parts by myself, as well as many fine detail parts produced by aftermarket suppliers. The kit is fully RC with added commander and bow MG movement. The early style idler was probably my biggest hurdle to overcome as far as accuracy as well as function. It was also what started my desire for accurate parts elsewhere on the vehicle. The spare track links were also very important for me to rework as I feel the detail on the link’s guides is a signature feature exclusive to the Panther. As my first project of this magnitude, it proved a great learning experience that included a lot of other “firsts” for me. Now, I’m looking forward to the next one.
Modified Parts
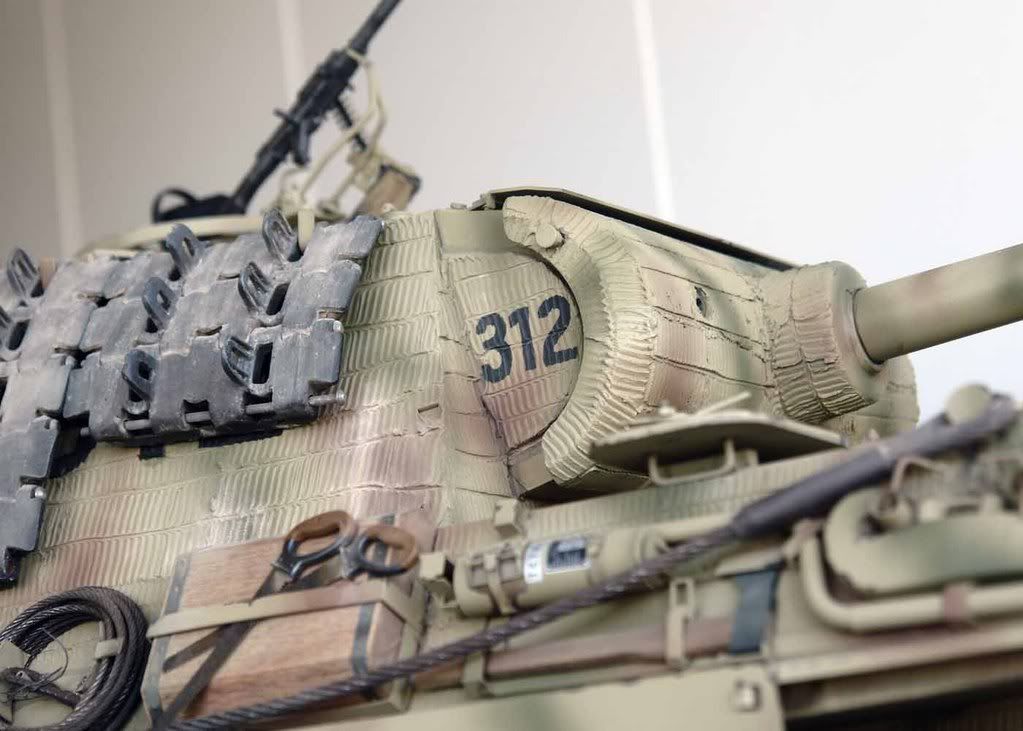
- Main gun mantle (deflector chin removed MG hole location corrected)
- Front fenders (detailed ribs, fasteners, fender sides, Bosch light cut-out)
- Muzzle brake (detailed collar and brake components)
- Loaders hatch (Interior detail with functional latch)
- Rear engine access hatch (detailed, tow bar/pin added)
- Main deck (detailed and modified front and rear to fit custom made, accurate intake guards,
fan guards and plates, recessed bolts added)
- Turret deck (detailed, vent guard)
- Side fender brackets (detailed)
- Driver and Radio operator hatches (detailed latches and handles)
- Exhaust armor guards (milled corners and added welds)
- Front glacis (detailed top edge and driver’s notch)
Custom Made Parts
- Early style idler wheels (designed in Solidworks, machined hub and outer rim with 3D printed
and detailed center piece and cap)
- Rear storage bins and lids (designed in Solidworks, 3D printed and detailed)
- Spare track links (designed in Solidworks, 3D printed and detailed)
- Exhaust pipes, heat shields and brackets. (fabricated with brass)
- Cooling exhaust fan guards (designed in Solidworks, 3D printed and detailed)
- Cooling intake guards (designed in Solidworks, 3D printed and detailed)
- Side fenders (fabricated with brass)
- Bow MG weather cover/plug (fabricated with styrene)
- Starter handle guide (fabricated with brass)
- Gertsack bracket (fabricated with brass)
Aftermarket Parts
Sixth Scale Icons
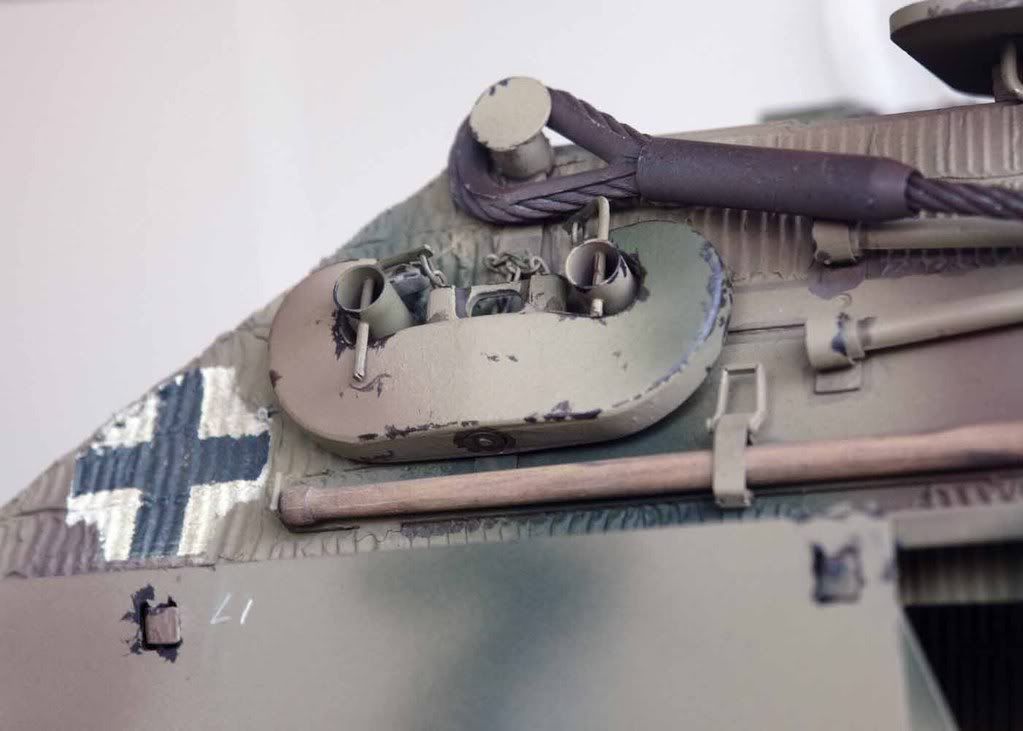
- Tool brackets and tools, rear spare track link brackets and tow cables
- Commander MG ring and MG mount
- Mesh covers for cooling intake and exhaust fan guards
- Periscopes and armor periscope guards
- Antennae
- Stowage bin latches
Steve Winstone
- Jack and jack brackets
- Bosch front and rear convoy lights (working)
- Bow MG (with strobe)
- Main gun travel lock
Bob Morey
- Driver and radio operator hatch hinges
- “C” shackles (functional)
- “U” shackles (functional)
Armorpax
- Driver and radio operator hatch spring assist arms (made functional)
- Bow MG kugelblende (Kent Wiik)


Regards
Tim
I’ve been working on this model for two years and had never intended to do the extent of detailing I did. However, once I started making parts more accurate to a Normandy time frame Panther Ausf G, I found it was very hard to stop at just one part. I also found I enjoyed the customization and accurate detailing part of the build as much, or more, then I enjoy the RC part. The parts are a combination of modified, Armortek parts, custom designed and built parts by myself, as well as many fine detail parts produced by aftermarket suppliers. The kit is fully RC with added commander and bow MG movement. The early style idler was probably my biggest hurdle to overcome as far as accuracy as well as function. It was also what started my desire for accurate parts elsewhere on the vehicle. The spare track links were also very important for me to rework as I feel the detail on the link’s guides is a signature feature exclusive to the Panther. As my first project of this magnitude, it proved a great learning experience that included a lot of other “firsts” for me. Now, I’m looking forward to the next one.
Modified Parts
- Main gun mantle (deflector chin removed MG hole location corrected)
- Front fenders (detailed ribs, fasteners, fender sides, Bosch light cut-out)
- Muzzle brake (detailed collar and brake components)
- Loaders hatch (Interior detail with functional latch)
- Rear engine access hatch (detailed, tow bar/pin added)
- Main deck (detailed and modified front and rear to fit custom made, accurate intake guards,
fan guards and plates, recessed bolts added)
- Turret deck (detailed, vent guard)
- Side fender brackets (detailed)
- Driver and Radio operator hatches (detailed latches and handles)
- Exhaust armor guards (milled corners and added welds)
- Front glacis (detailed top edge and driver’s notch)
Custom Made Parts
- Early style idler wheels (designed in Solidworks, machined hub and outer rim with 3D printed
and detailed center piece and cap)
- Rear storage bins and lids (designed in Solidworks, 3D printed and detailed)
- Spare track links (designed in Solidworks, 3D printed and detailed)
- Exhaust pipes, heat shields and brackets. (fabricated with brass)
- Cooling exhaust fan guards (designed in Solidworks, 3D printed and detailed)
- Cooling intake guards (designed in Solidworks, 3D printed and detailed)
- Side fenders (fabricated with brass)
- Bow MG weather cover/plug (fabricated with styrene)
- Starter handle guide (fabricated with brass)
- Gertsack bracket (fabricated with brass)
Aftermarket Parts
Sixth Scale Icons
- Tool brackets and tools, rear spare track link brackets and tow cables
- Commander MG ring and MG mount
- Mesh covers for cooling intake and exhaust fan guards
- Periscopes and armor periscope guards
- Antennae
- Stowage bin latches
Steve Winstone
- Jack and jack brackets
- Bosch front and rear convoy lights (working)
- Bow MG (with strobe)
- Main gun travel lock
Bob Morey
- Driver and radio operator hatch hinges
- “C” shackles (functional)
- “U” shackles (functional)
Armorpax
- Driver and radio operator hatch spring assist arms (made functional)
- Bow MG kugelblende (Kent Wiik)
Regards
Tim
 Stunning work!

